What is a 1-2-2 neutral zone forecheck?
The 1-2-2 neutral zone forecheck is a defensive structure designed to disrupt the opponent's transition game while maintaining strong defensive positioning. This system effectively clogs the neutral zone and forces opponents to either dump the puck or attempt high-risk plays through traffic.
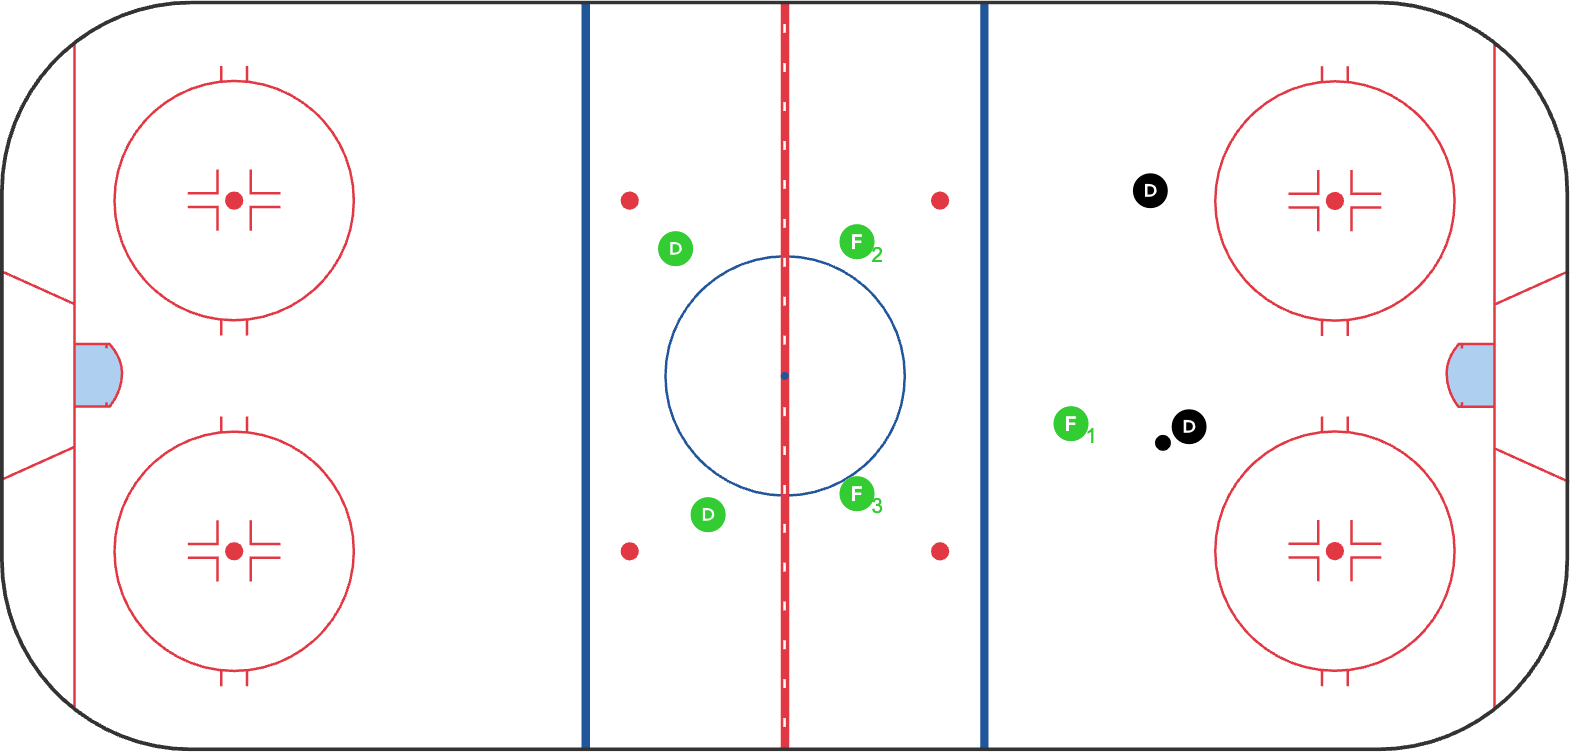
The first forward (F1) positions themselves at the red line, applying pressure on the puck carrier and forcing them to one side of the ice. F1's primary responsibility is not to create turnovers but to dictate which side of the ice the play will develop.
The second layer consists of two forwards (F2 and F3) positioned in a supportive layer behind F1 depending on how deep into the opponent’s zone the puck is. They’ll want to be slightly staggered based on where F1 is steering the play. These players must read the play develop and be ready to step up on dump-ins or retreat if the opposition successfully penetrates the neutral zone. They create a wall effect that eliminates cross-ice passing options.
The defensemen (D1 and D2) position themselves near the defensive blue line, maintaining gap control and ready to retrieve dump-ins or defend against zone entries. They must communicate effectively with the forwards above them to ensure proper coverage and prevent seam passes.
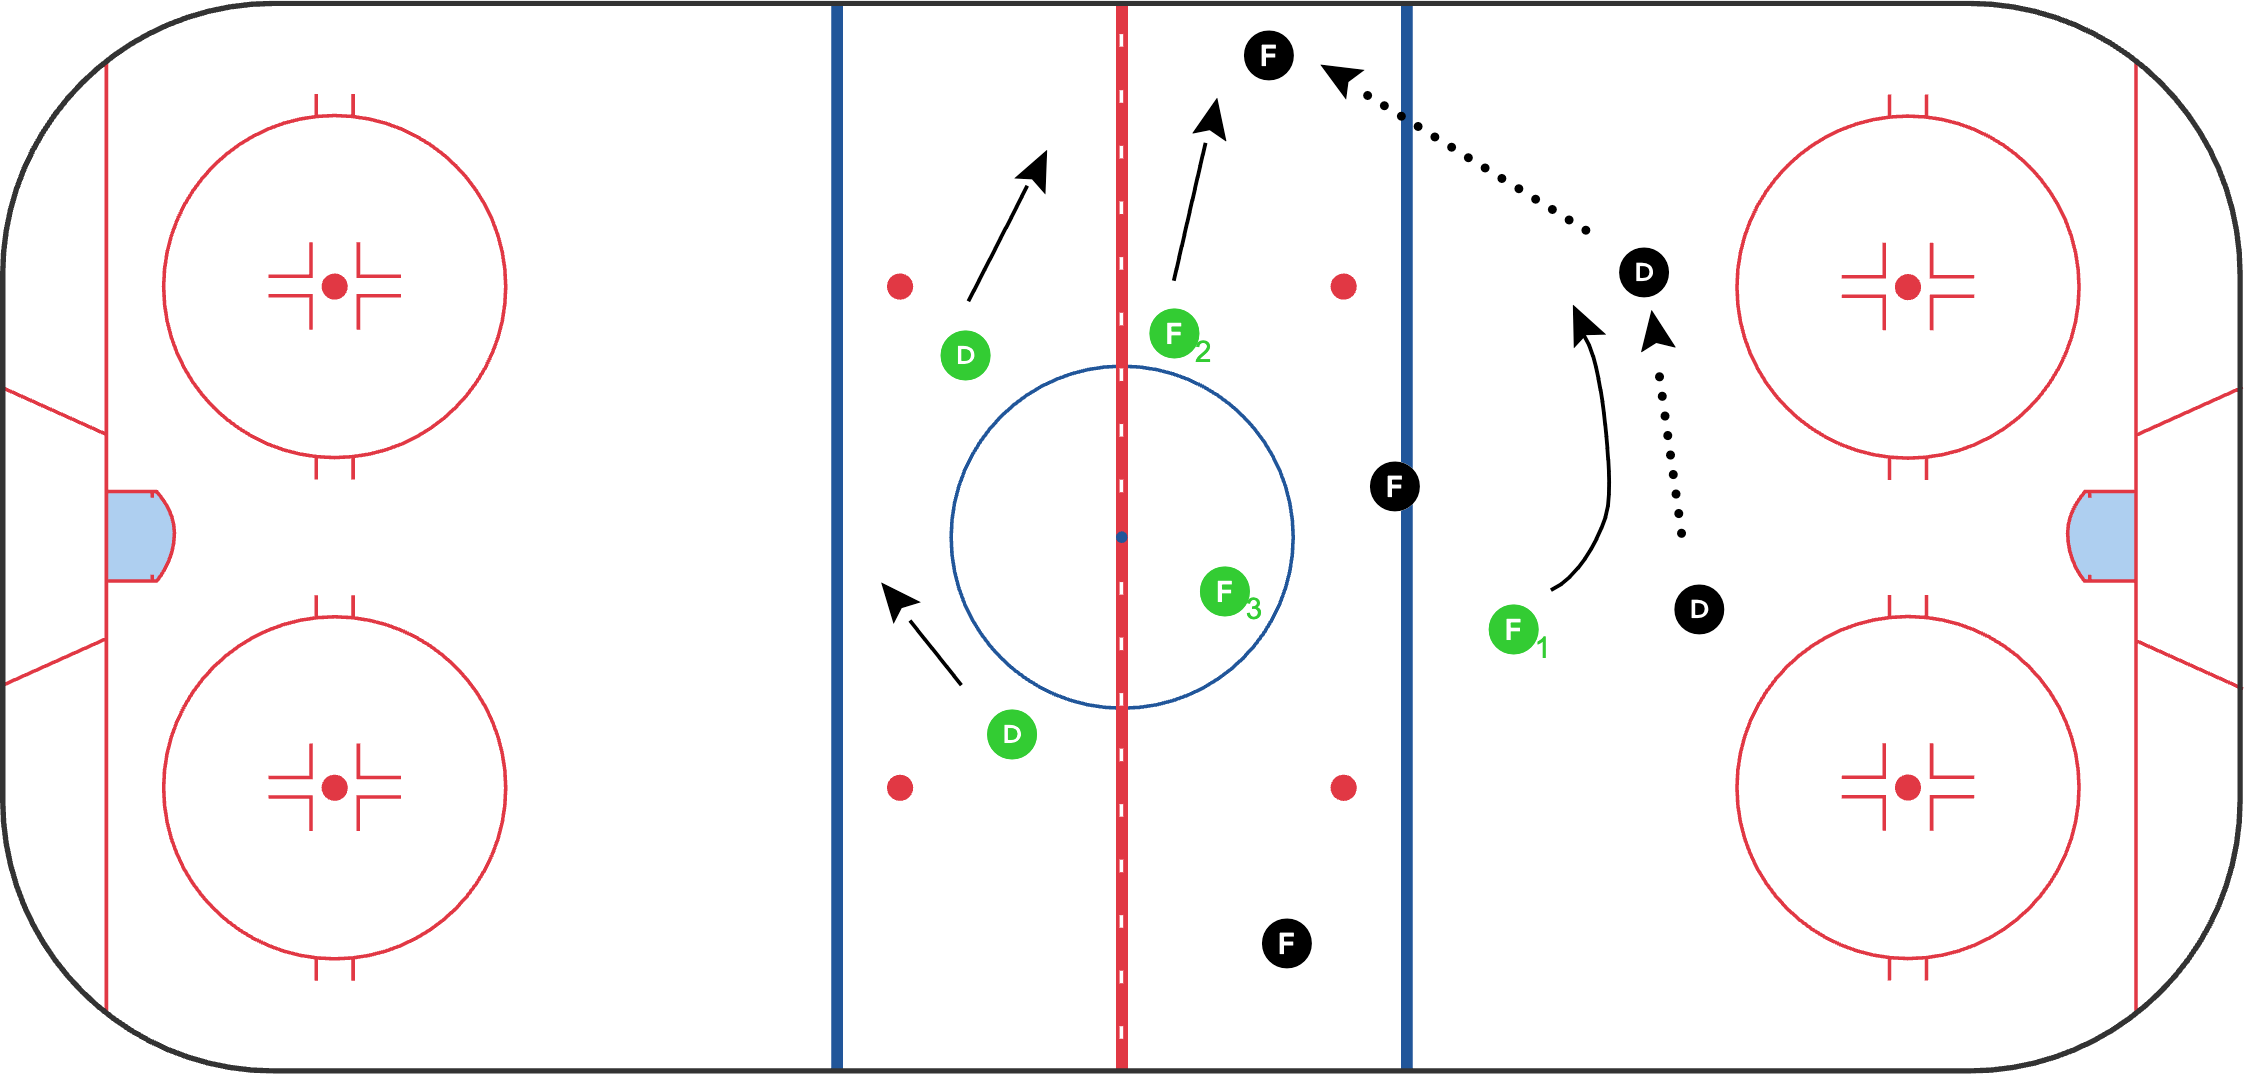
The key to executing this forecheck is maintaining proper spacing between all three layers. Players must stay connected, moving as a five-man unit. When executed correctly, this system forces opponents to either attempt low-percentage plays through the neutral zone or resort to dump-ins, which we can then retrieve and transition quickly to offense. It's particularly effective against teams that rely heavily on controlled zone entries or stretch passes.
Why It’s Effective
The 1-2-2 NZFC forces opponents to dump the puck in instead of carrying it in with possession.
- It effectively clogs the neutral zone and forces opponents to either dump the puck or attempt risky plays through traffic
- F1 dictates which side of the ice the play will develop, making the opponent's movements more predictable
- F2 and F3 create a wall effect between the blue lines to eliminate cross-ice passing options
- The defensemen maintain gap control and are positioned to defend against zone entries or retrieve dump-ins
When executed properly, opponents are left with two unfavourable choices: attempting low-percentage plays through the neutral zone or resorting to dump-ins. Use this forecheck if you have a team that’s defensively-conscious and content to contain an attack before it begins. It doesn’t rely on raw aggression, and it’s fairly intuitive. All forechecks require communication, but the 1-2-2 puts players in their natural spots, which forces the regrouping team to make plays through multiple layers of defence.
Practice
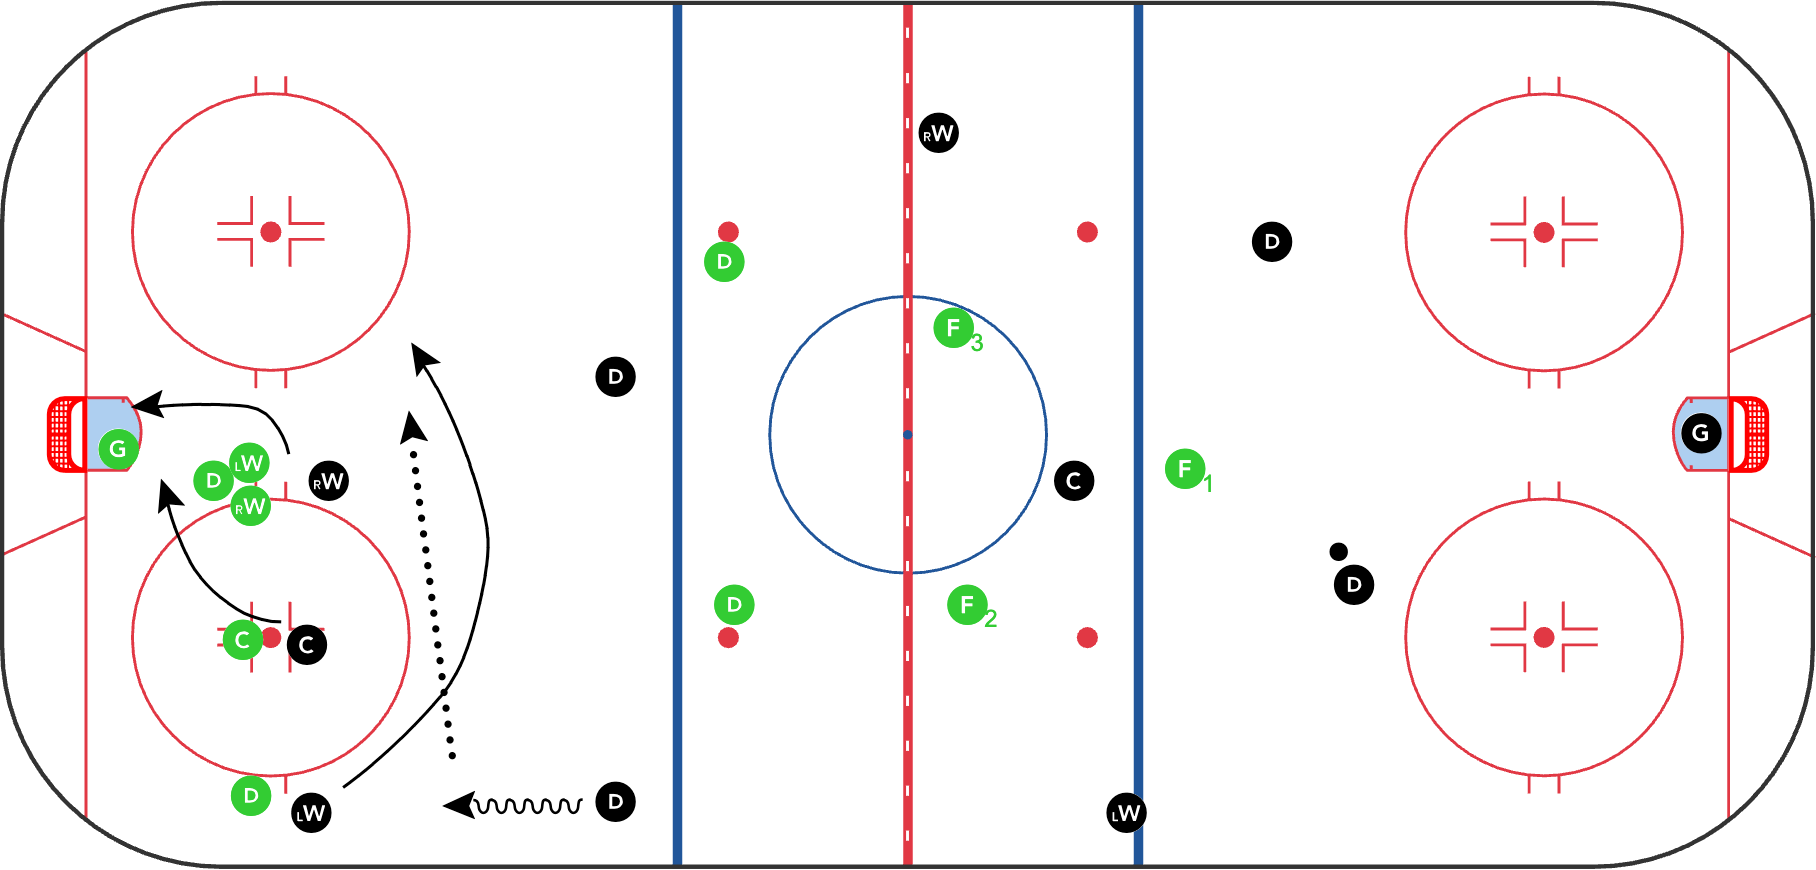
Here’s a drill you can use to practice this forecheck. It starts with a faceoff win, so your players will really be primed for a game-like situation.
-
Black runs a faceoff win
-
After the faceoff play, coach blows the whistle and spots puck in neutral zone
-
Green gaps up and runs forecheck
-
Play 5on5 for 30 seconds or so afterwards
The Evidence
Pay attention to the habits of the first forward and whether or not he pushes angles the puck carrier to the wall. F2 and F3 seal near the red line to create turnovers.
Get everything you need to know about neutral zone forechecks here!
Learn more about the offenzive zone forecheck too.
2-1-2 Offensive Zone Forecheck
1-2-2 Offensive Zone Forecheck
1-1-3 Offensive Zone Forecheck