What is a 2-3 neutral zone forecheck?
The 2-3 neutral zone forecheck is an aggressive pressure system designed to disrupt the opponent's transition game through the neutral zone. This system employs two forwards as primary forecheckers with three players forming a defensive barrier behind them.
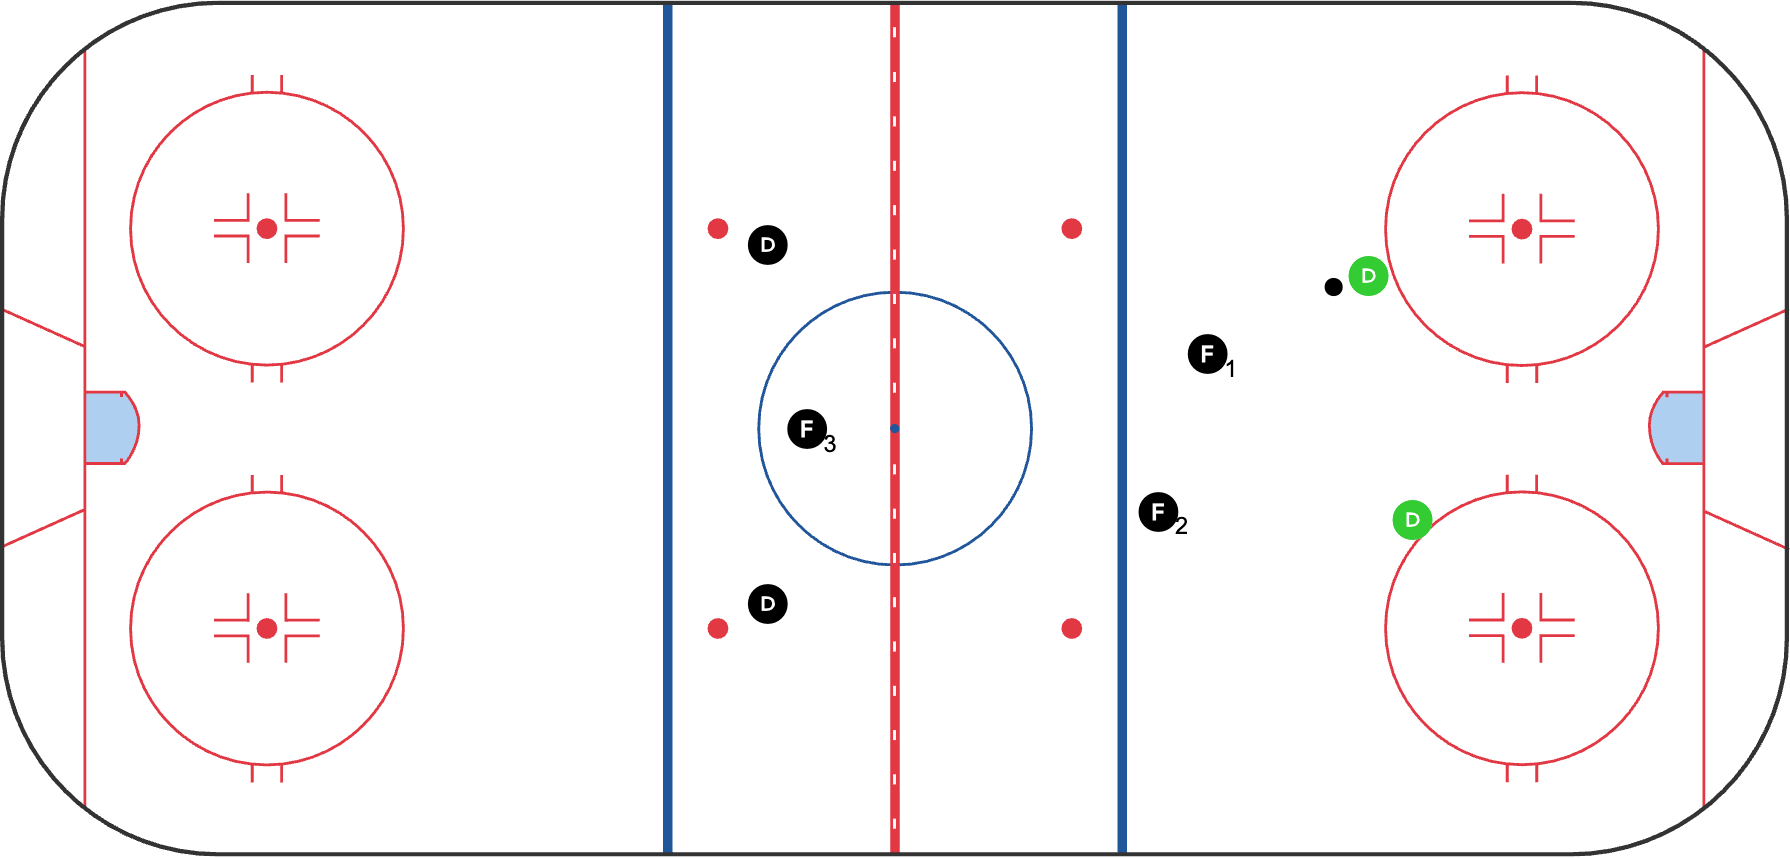
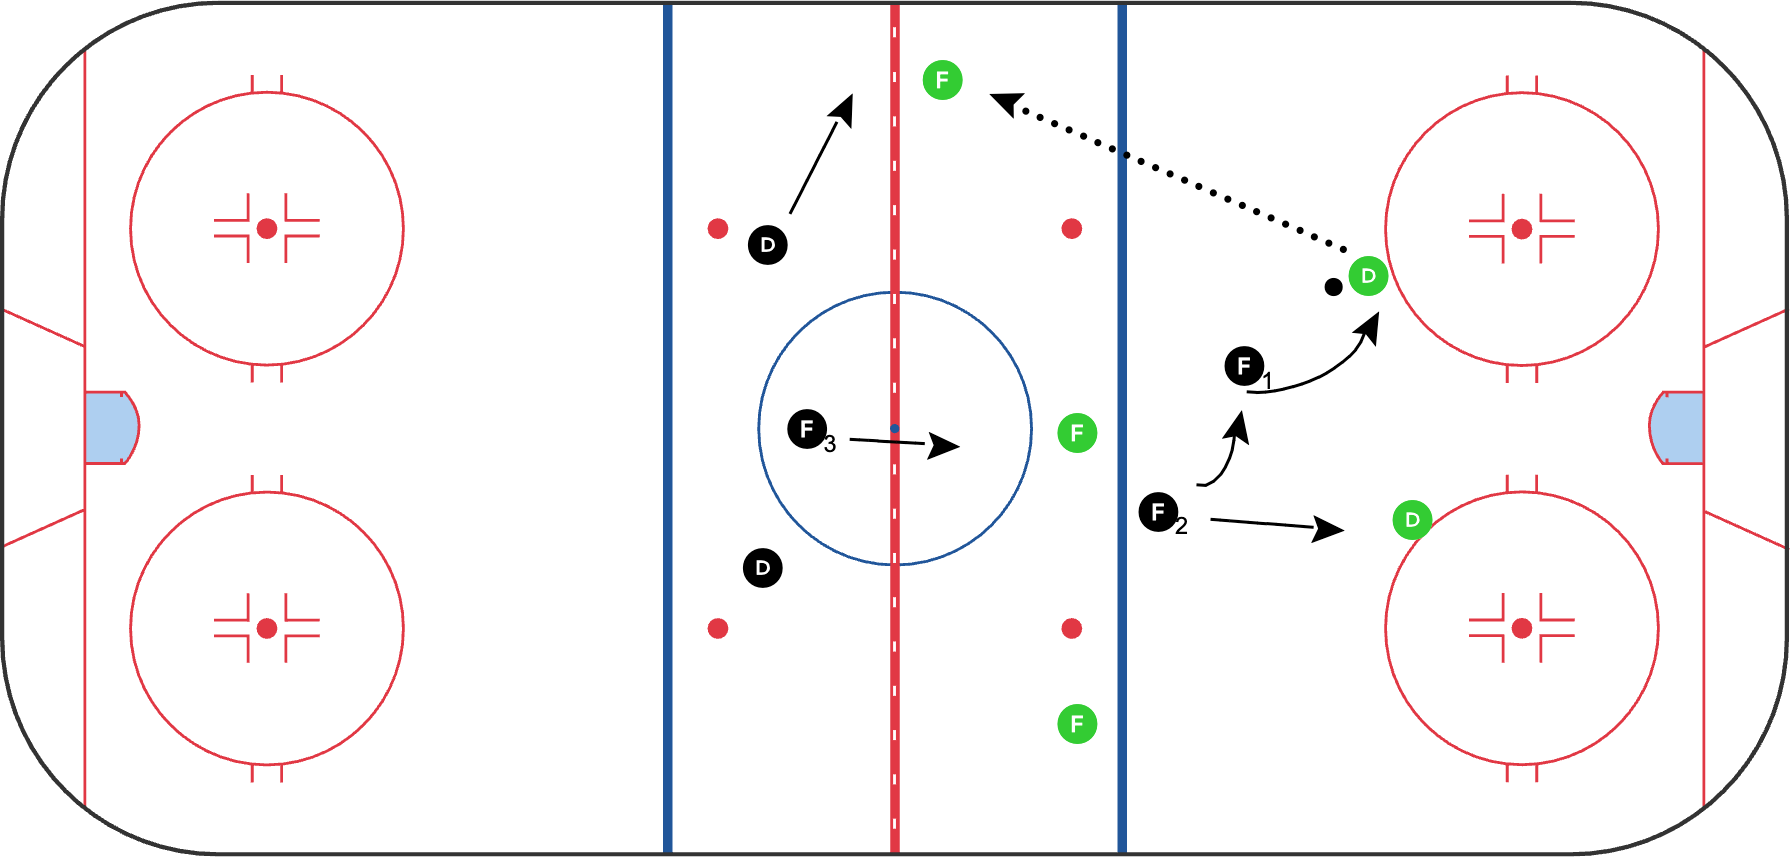
The two forecheckers (F1 and F2) work in tandem to pressure the puck carrier and their immediate support option. Their goal is to force rushed decisions and funnel the play toward the defensive wall where the third forechecker and the D await, building a barrier. These forwards must be quick and possess excellent conditioning to maintain consistent pressure.
The F3, D1, and D2 form a line across the neutral zone. This three-player barrier typically aligns themselves between the red line defensive blue line. Their positioning must be fluid and coordinated, shifting as a unit based on where F1 and F2 are steering the play.
The success of the 2-3 depends on excellent communication and synchronized movement between all five players. The three-player barrier must maintain proper gaps and be ready to step up on loose pucks or retreat if the opposition successfully penetrates the neutral zone.
This system is particularly effective against teams that like to carry the puck through the neutral zone or rely on stretch passes. When executed properly, it forces opponents to either attempt high-risk passes through traffic or resort to dump-ins. However, teams must be mindful of their positioning to avoid getting caught if the opposition successfully breaks through the pressure.
Why It’s Effective
The 2-3 neutral zone forecheck is challenging to play against because:
- It's an aggressive pressure system that uses two forecheckers (F1 and F2) working together to force rushed decisions from the puck carrier
- The forecheckers funnel the play toward a three-player defensive barrier, limiting the opponent's options
- The three-player barrier (F3, D1, and D2) forms a tight, coordinated unit that shifts based on where the forecheckers are steering the play
Use this system against teams with below average puck moving defencemen. The D to D pass is one of the oldest tricks in the book when starting the transition through the neutral zone, so it’s stressful when a defenceman looks up and has no open passing outlets. The 2-3 NZFC is also effective thwarting D who like to skate the puck through the neutral zone or rely on stretch passes, forcing them to either make risky passes through traffic or resort to dump-ins. It requires a high level of conditioning and coordination, but if you have speedy forwards and agile defencemen, it can stop the opponent’s attack before it starts.
Practice
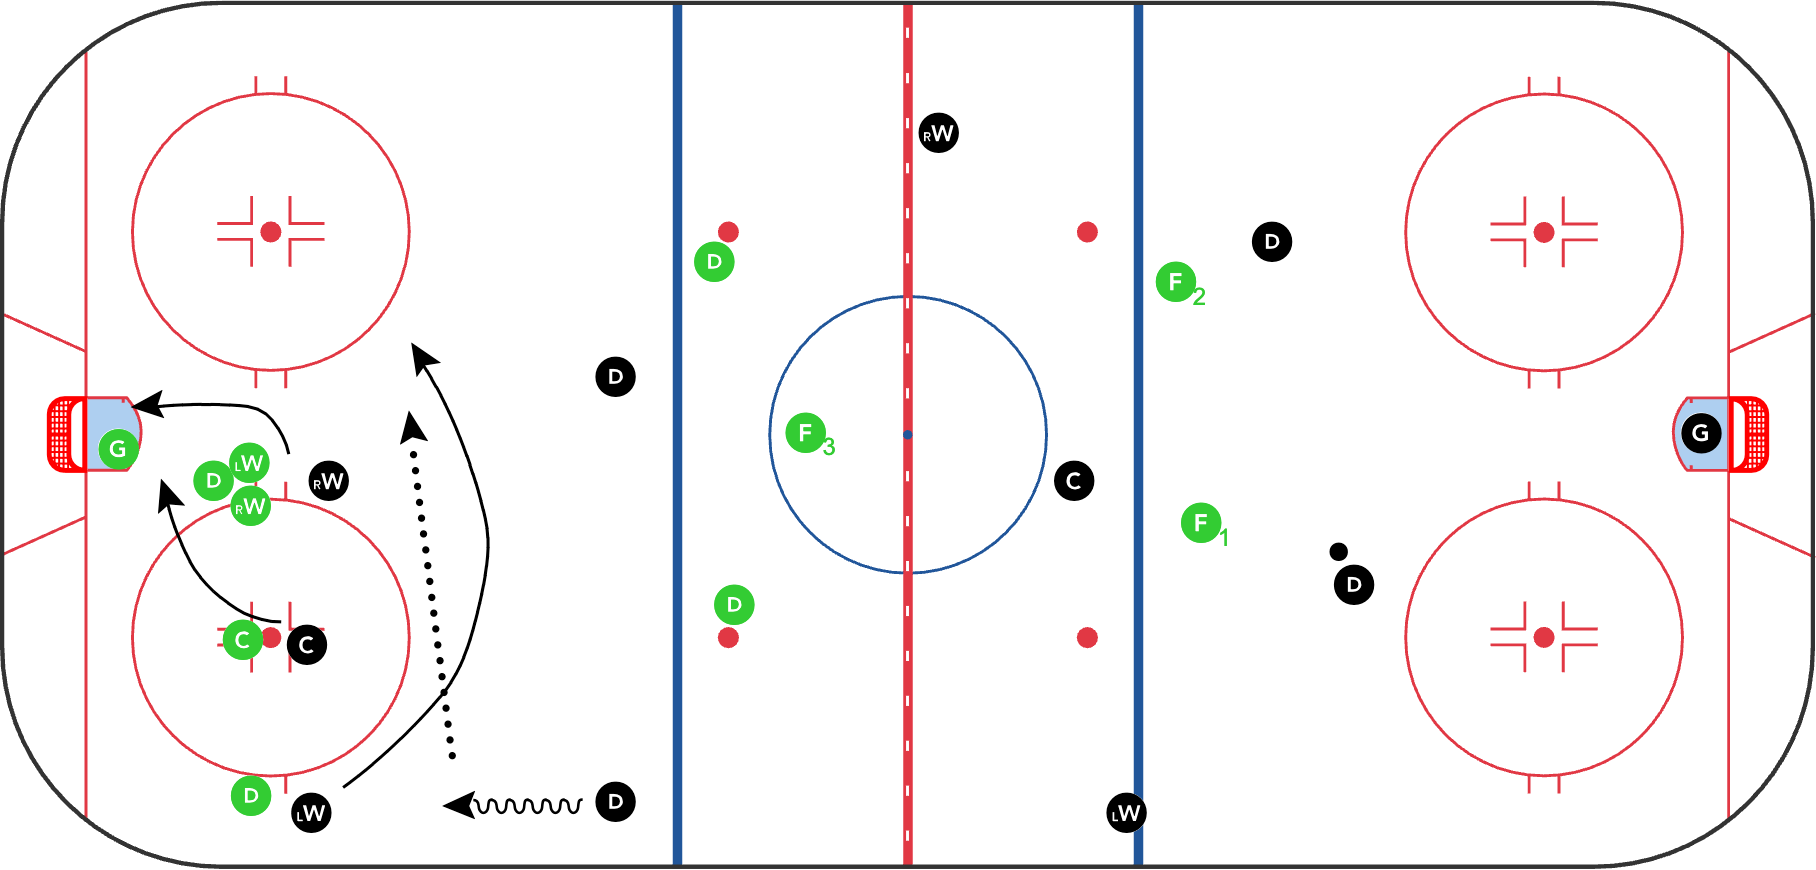
Here’s a drill you can use to practice this forecheck. It starts with a faceoff win, so your players will really be primed for a game-like situation.
-
Black runs a faceoff win
-
After the faceoff play, coach blows the whistle and spots puck in neutral zone
-
Green gaps up and runs forecheck
-
Play 5on5 for 30 seconds or so afterwards
The Evidence
Watch how the first two forwards make a D to D pass impossible. If the D are able to move the puck, the line across the neutral zone forces a dump in situation. This is basically a hard man to man scenario.
Get everything you need to know about neutral zone forechecks here!
Learn more about the offenzive zone forecheck too.
2-1-2 Offensive Zone Forecheck