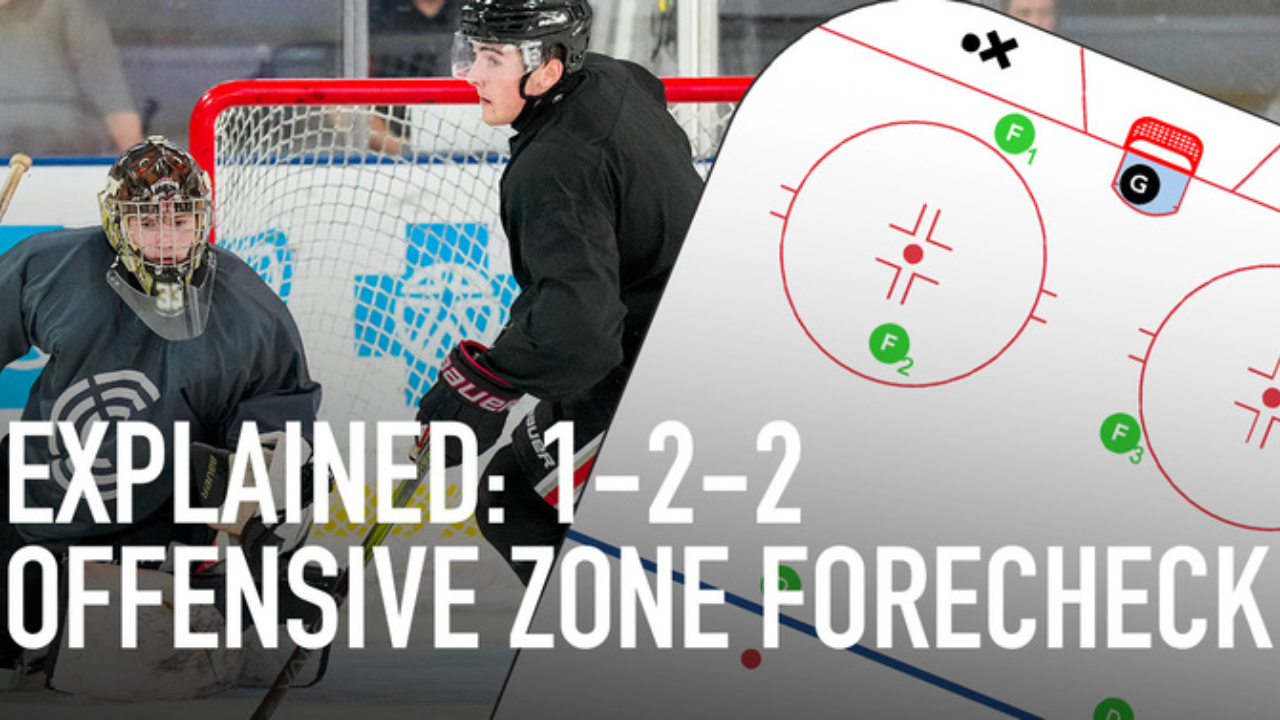
What is a 1-2-2 offensive zone forecheck?
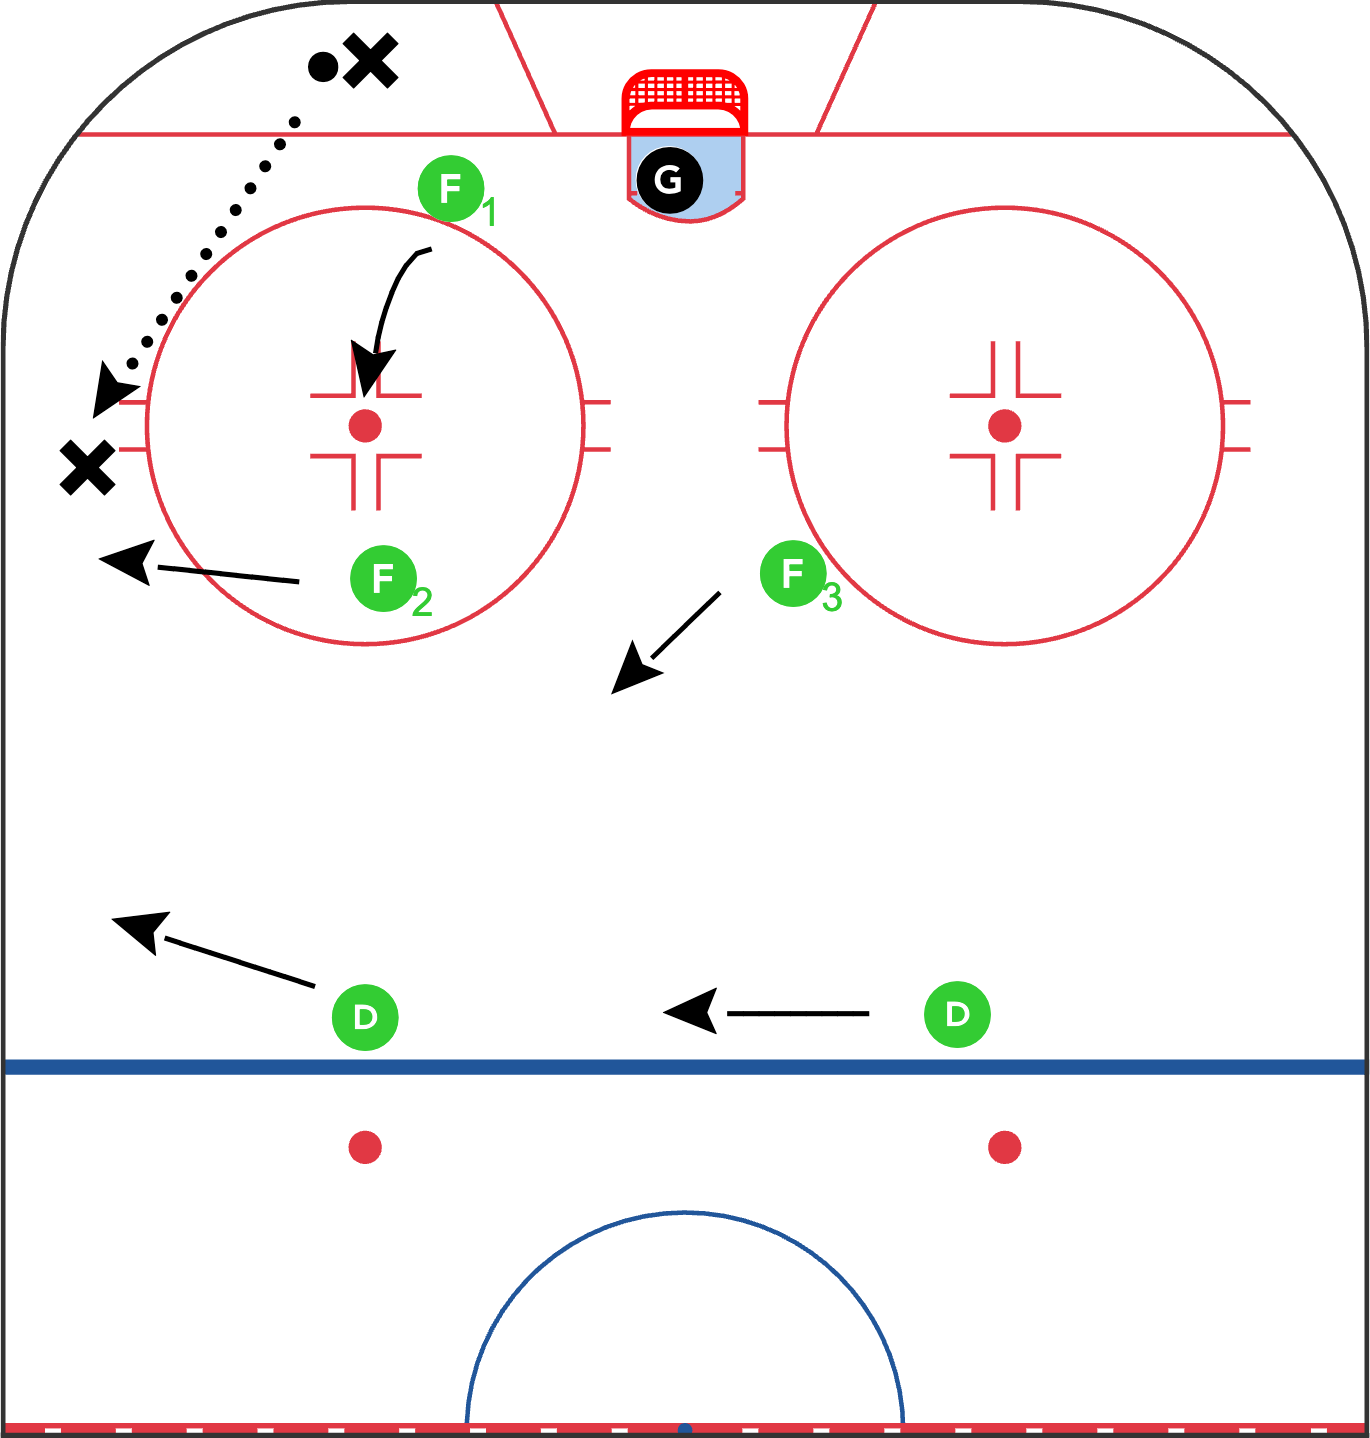
The 1-2-2 offensive zone forecheck is a structured system designed to create turnovers high in the offensive zone and maintain pressure. In this formation, we position one forward (F1) as the primary forechecker, two players in the middle of the zone (F2 and F3), and our defensemen (D1 and D2) holding the blue line.
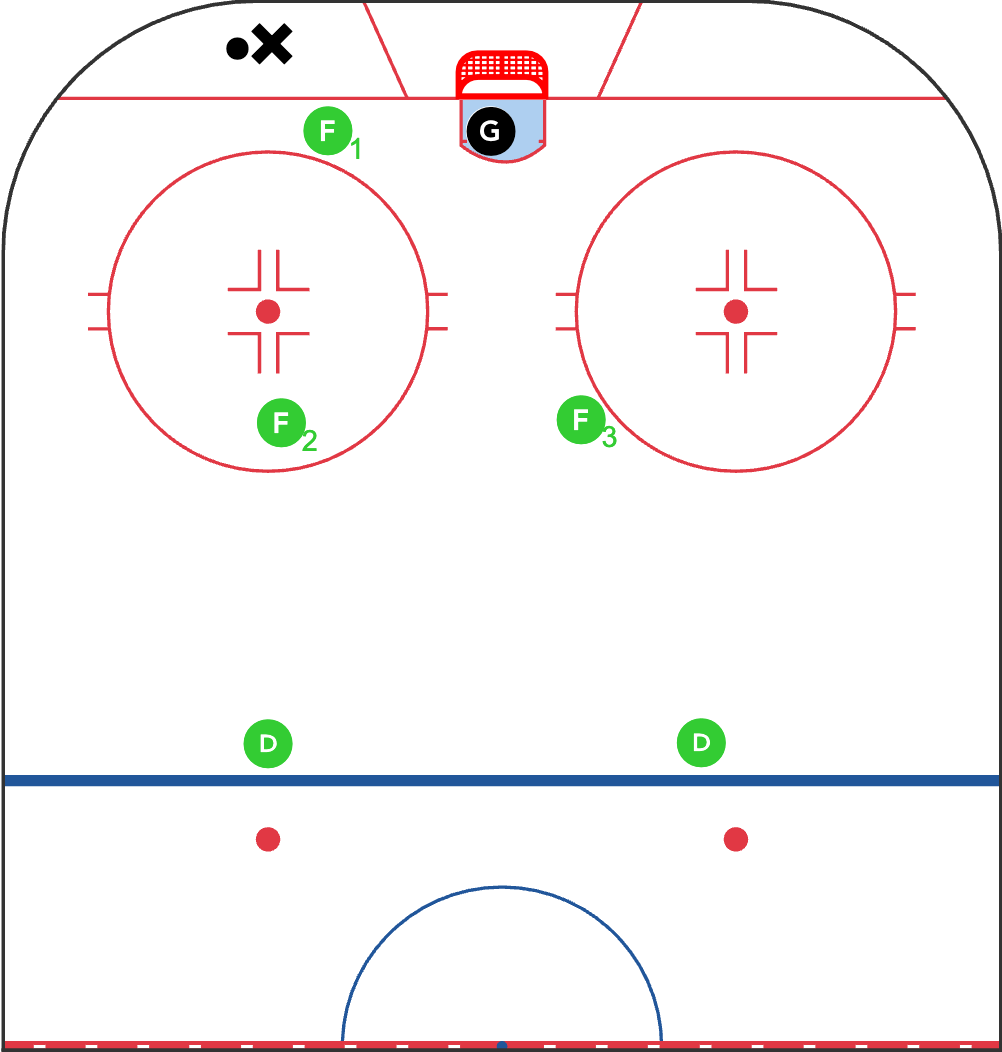
Every forecheck is open to modification from the coach, but most often the F1's primary responsibility is to angle the puck carrier toward the boards, taking away the middle of the ice. They must maintain an active stick and proper body positioning to eliminate the opponent's ability to make cross-ice or D to D passes back behind the net. Speed, aggression, and anticipation are crucial for F1's effectiveness.
Our second layer consists of F2 and F3 skating through the dot lines (the imaginary lines that run length-wise on the ice between face-off dots), ready to react to the play. These players must read F1's pressure and position themselves accordingly. If F1 forces the play to either wall, the strong-side middle forward checks on the strong side wall while the weak-side forward maintains middle ice coverage.
The defensemen position themselves just inside the blue line, ready to pinch on loose pucks or rim attempts. However, they must exercise good judgment – we don't want both D-men pinching simultaneously unless we have adequate forward coverage.
The key to executing this forecheck effectively is communication and quick rotation. When executed properly, the 1-2-2 creates a suffocating effect on the opposing team's breakout, forcing turnovers and generating scoring opportunities. Players must maintain their spacing and not get caught too deep in the zone, which could lead to odd-man rushes against.
Why It’s Effective
The 1-2-2 offensive zone forecheck is challenging to play against for several key reasons:
- It creates a suffocating effect on breakouts by using F1 to angle the puck carrier toward the boards while eliminating cross-ice and D-to-D passing options
- The second layer of forecheckers (F2 and F3) are positioned in the dot lines, ready to react to where F1 steers the play, making it difficult to find clean breakout lanes
- The defensemen are positioned to pinch and maintain offensive zone pressure while preventing clean exits, forcing teams to make high-risk plays
- When executed properly, this system forces turnovers and generates immediate scoring opportunities while maintaining defensive coverage against odd-man rushes
- Opposing defencemen are left with few pass options and often must resort to chipping the puck glass and out
Use this forecheck against teams with defencemen who pass the puck considerably well. A more aggressive forecheck such as a 2-1-2 won’t be as effective against skilled puck-moving defencemen because they can beat two forecheckers with one pass. The 1-2-2 might give the D time to make one pass, but our forecheckers will be on the pass receiver before they know what to do with the puck.
Practice
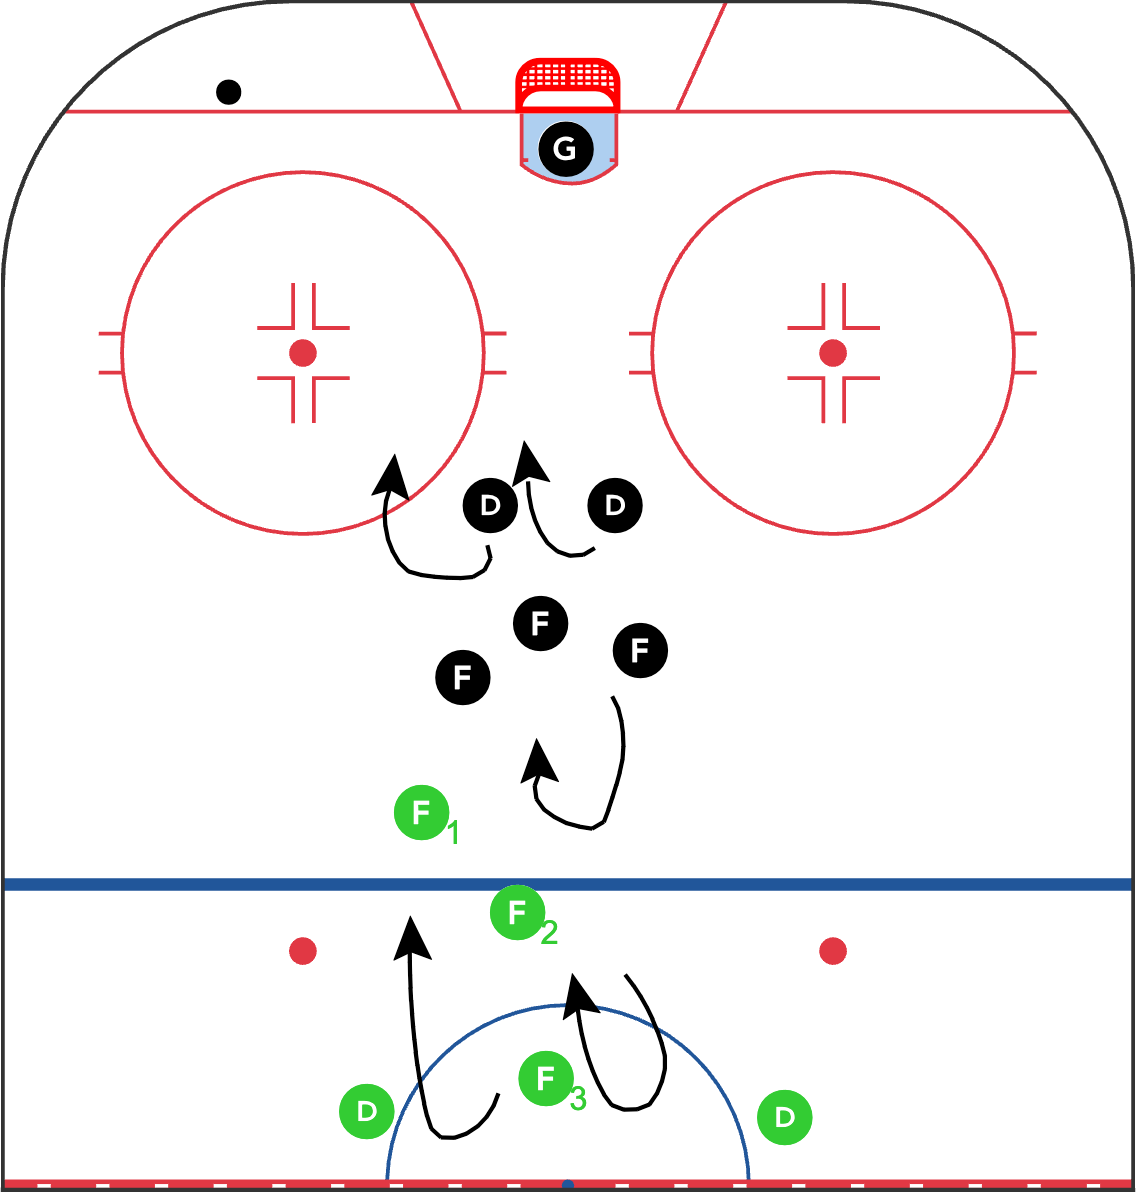
Here’s a drill you can use to practice this forecheck. This is a simple drill and can be used with any offensive zone forecheck. You can put your own spin on it too! Players can start at a standstill or be milling about and activate on the whistle.
- Both teams gap up, breakout team touches blue line, forecheck team touches red line
- Forecheckers try to retrieve puck, breakout team tries to break out!
- Play 5on5 for 30 seconds or so
The Evidence
Watch how the F1 steers traffic one way or the other, right into the waiting jaws of the second layer of forwards (F2 and F3).
Get everything you need to know about offensive zone forechecks here!
2-1-2 Offensive Zone Forecheck
1-1-3 Offensive Zone Forecheck
Learn more about the neutral zone forecheck too.