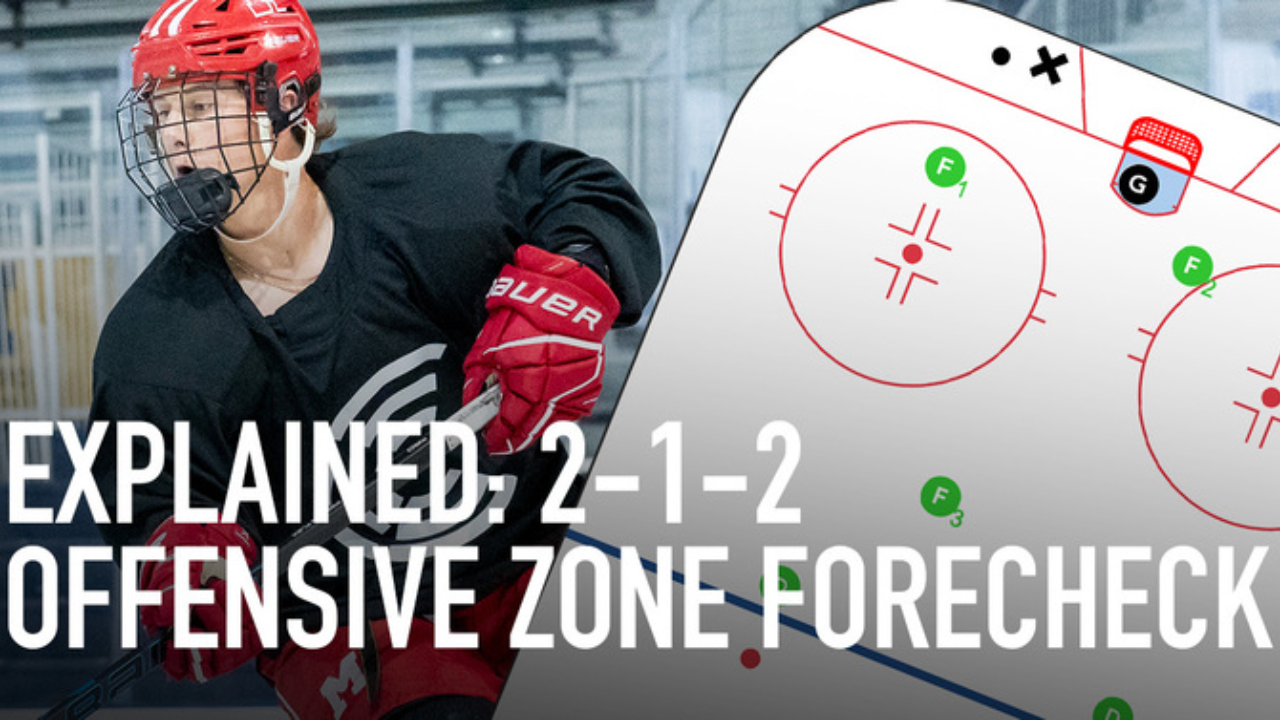
What is a 2-1-2 offensive zone forecheck?
The 2-1-2 forecheck is an aggressive pressure system that commits two forwards deep in the offensive zone to create turnovers and scoring opportunities. This system is particularly effective against teams that struggle with puck movement or have less mobile defensemen.
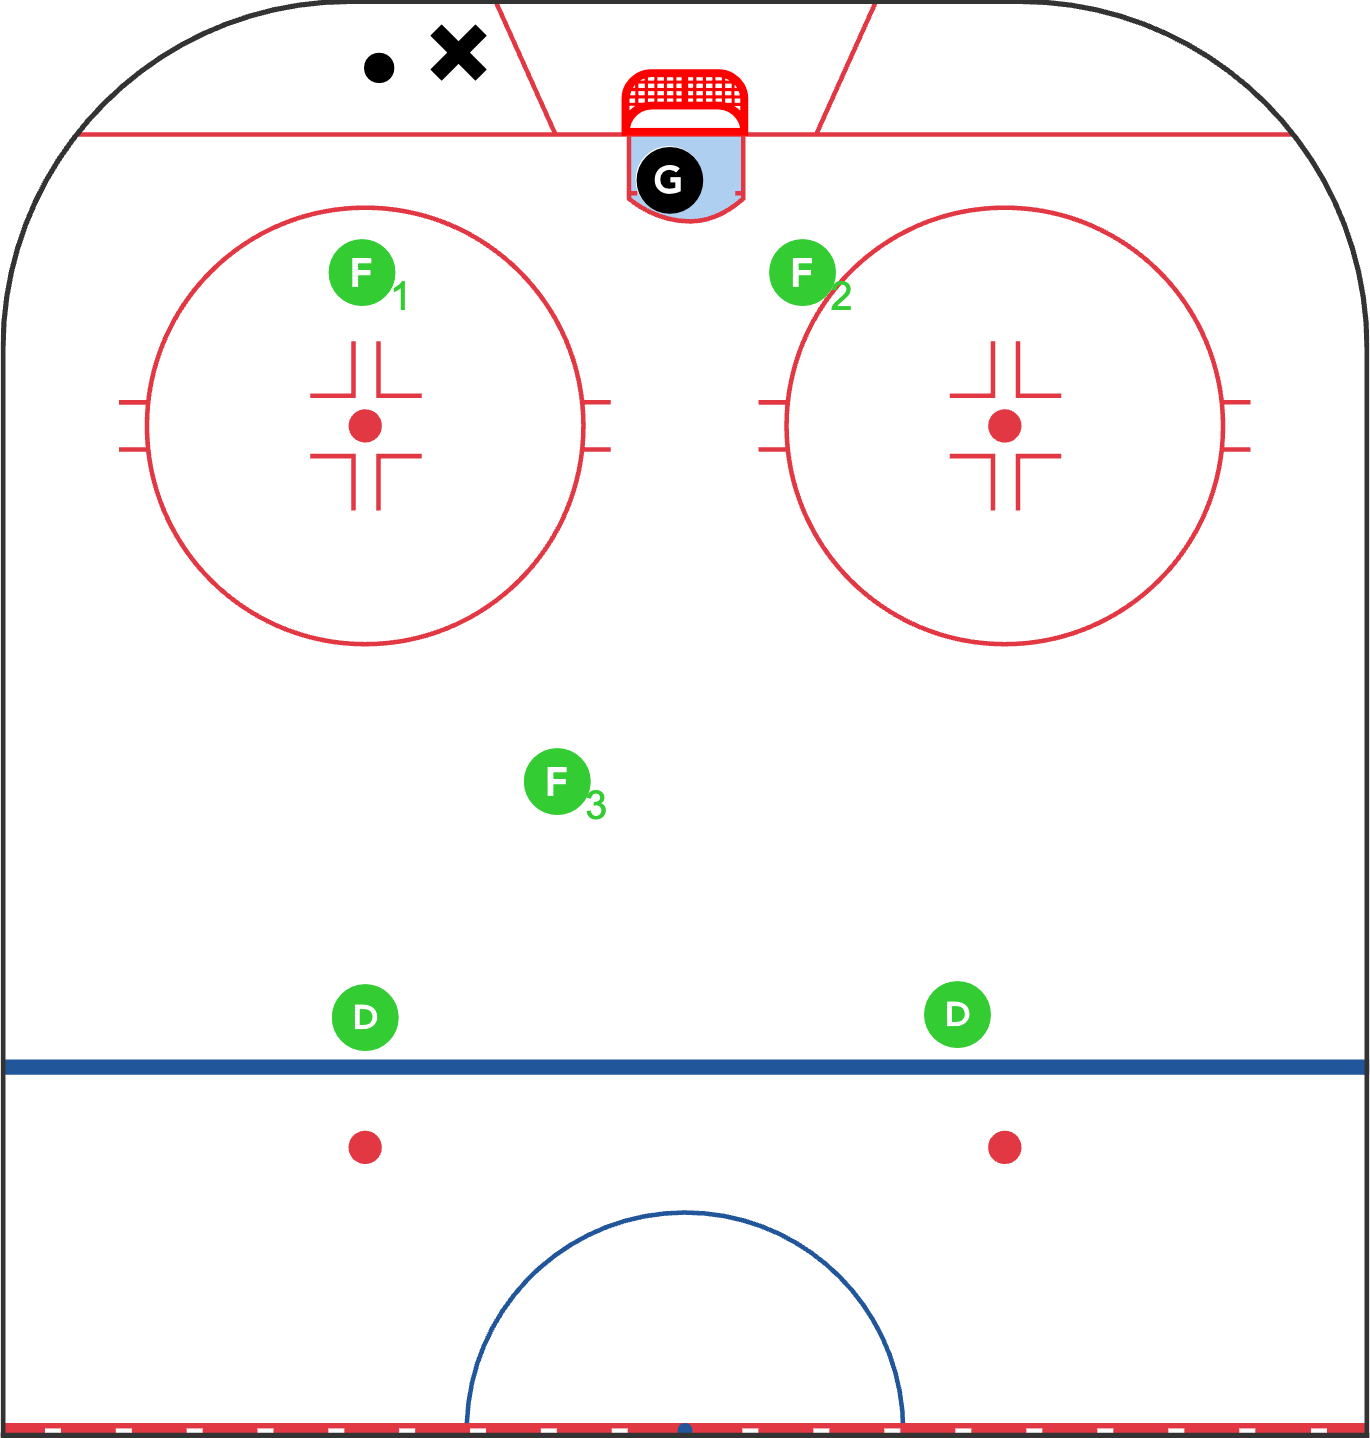
F1 and F2 work in tandem as the primary forecheckers, attacking the puck carrier and their immediate support option. F1 pressures the puck carrier while F2 takes away the first passing option, usually positioning themselves to cut off the strong-side wall or behind-the-net escape route. These forwards must be quick and relentless in their pursuit.
F3 plays a crucial role as the high forward, typically positioned around the top of the circles. Their responsibility is to read the play and provide support where needed while being ready to retreat if the opposition breaks out. This player must have excellent hockey sense and positional awareness.
Our defensemen (D1 and D2) maintain standard positions at the blue line but must be ready to step up and keep pucks alive. They need to be selective with their pinches since we already have two forwards committed deep in the zone.
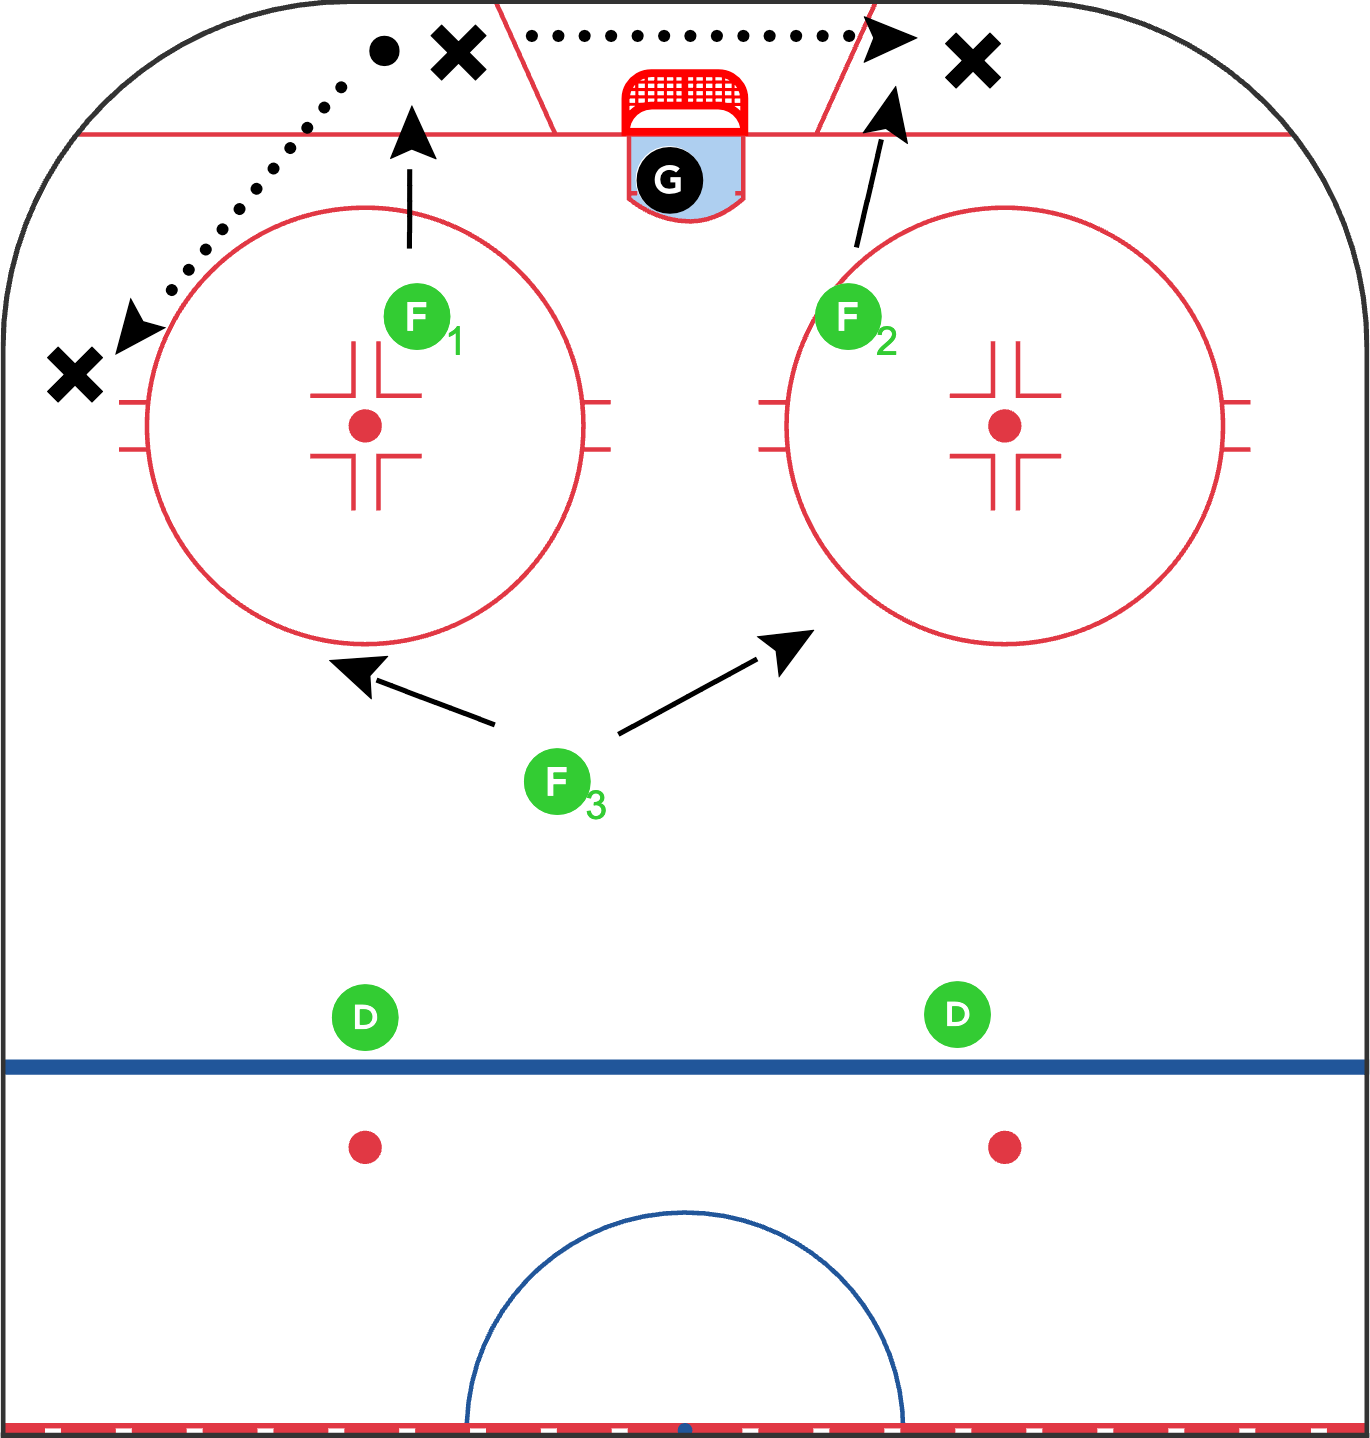
The success of the 2-1-2 depends on quick transitions and excellent conditioning. When F1 or F2 get beaten, they must immediately work to get back into position. Communication between all five players is essential to prevent breakdowns that could lead to odd-man rushes against. This system can be particularly effective when trying to create chaos and force turnovers, but it requires disciplined execution to avoid defensive vulnerabilities.
Why It’s Effective
The 2-1-2 offensive zone forecheck is an aggressive pressure system that is challenging to play against for several key reasons:
- It commits two forwards deep in the offensive zone to create immediate pressure on the puck carrier and their support option, forcing quick decisions under duress.
- The third forward positions high in the middle of the ice, ready to provide support while preventing easy outlets through the middle.
- The system creates chaos and forces turnovers through relentless pressure from two forecheckers, making it particularly effective against teams that struggle with puck movement.
- When executed properly, it requires excellent conditioning from the forechecking forwards and disciplined execution to avoid defensive vulnerabilities.
Use this forecheck against teams with D who might struggle to move the puck to their forwards. This level of pressure will be suffocating as long as your forecheckers commit to finishing their checks. This forecheck is beat by D who keep it simple and rim the puck or chip it off the wall to their wingers, so it requires your D to play fast and react to the situation as well - if one players goes, everybody goes!
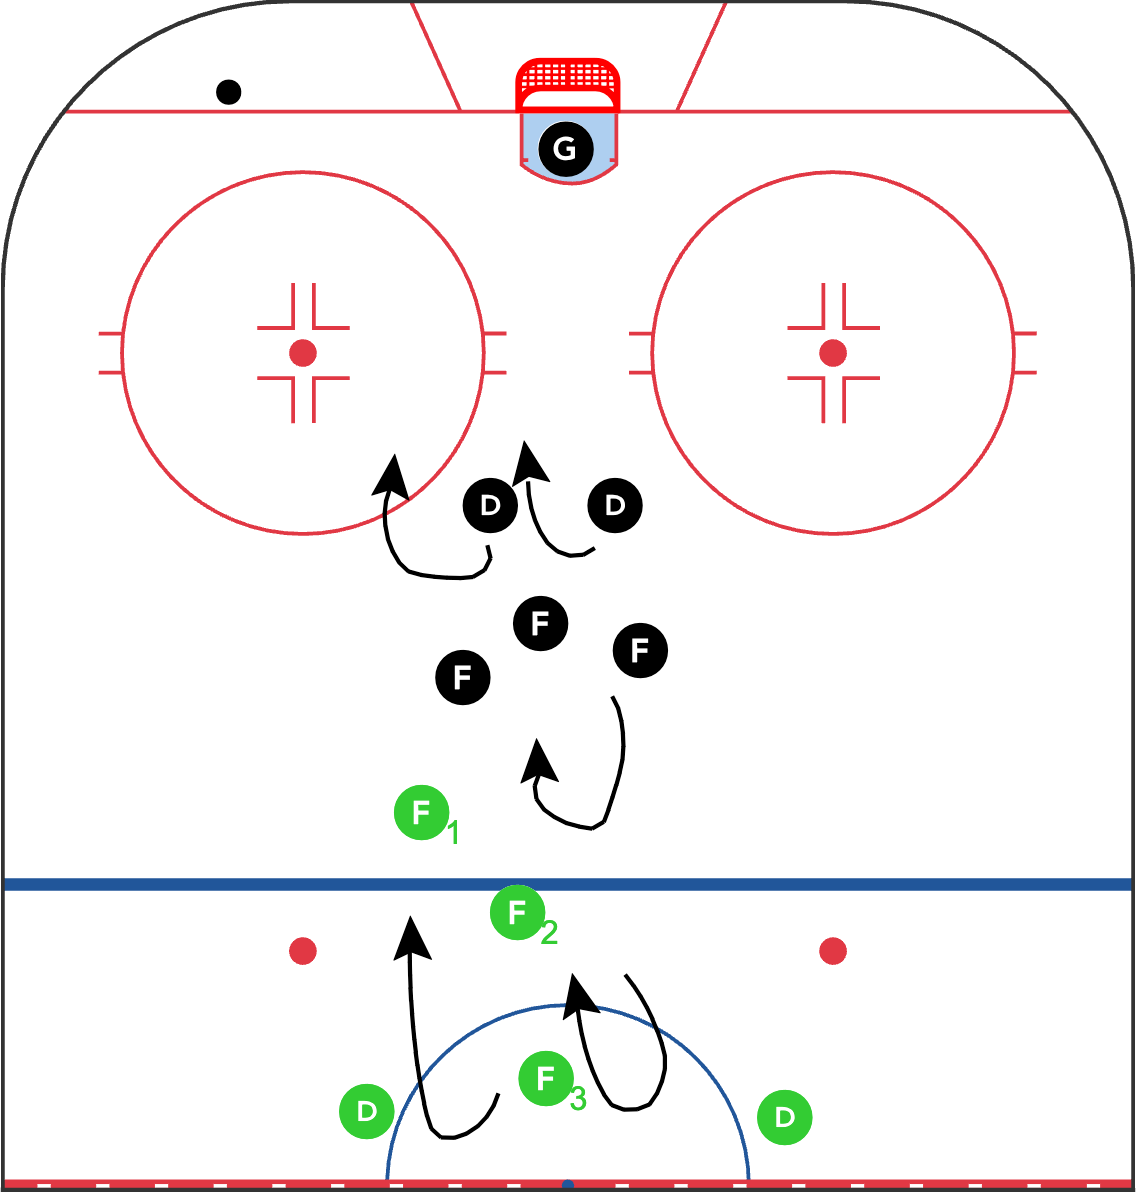
Practice
Here’s a drill you can use to practice this forecheck. This is a simple drill and can be used with any offensive zone forecheck. You can put your own spin on it too! Players can start at a standstill or be milling about and activate on the whistle.
- Both teams gap up, breakout team touches blue line, forecheck team touches red line
- Forecheckers try to retrieve puck, breakout team tries to break out!
- Play 5on5 for 30 seconds or so
The Evidence
Used by speedy teams like the 2024 New Jersey Devils, watch how much pressure the retrieving defencemen have to deal with in order to move the puck north.
Get everything you need to know about offensive zone forechecks here!
1-2-2 Offensive Zone Forecheck
1-1-3 Offensive Zone Forecheck
Learn more about the neutral zone forecheck too.