If you want fast players, develop their speed and do not slow them down with poorly implemented and executed practice plans.
It’s Go Time!
It’s Friday Night. You have prepped the team all week for this game. This is the big one.
This week’s practices have been grueling with high intensity from the moment players step on the ice to the moment the Zamboni chases them off. Yesterday’s practice, Thursday’s, was light with barely any high intensity drills, so they should be ready to go.
As you walk down the tunnel you think back to the last few weeks of practice. Long, tough hitting battle drills and most nights ending with a 10 to 15 minute hard skate to get the legs ready.
What could possibly go wrong after weeks of practices that were grit filled, grindfests, resembling the movie Miracle? Isn’t that the way to make the toughest, best team come game day?
The above descriptions of tough, constant grinding during practices is a classic one. Coaches think constant hard work is the key to victory. And don’t get me wrong, it is absolutely a part of it. However, by reverse engineering the game of hockey and mimicking game demands in practice, you can skate off the ice having had the Perfect Hour of Hockey Practice.
Sprint Based Hockey
Sprint Based Hockey is a system that slightly modifies classic practice layouts to prioritize fast and fresh over slow and tired. Hockey Coaches want fast players – but do not always know how to develop speed.
Article 1 – Sprint Based Hockey: the Cutting Edge for Hockey Coaches – and Article 2 – Sprint Based Hockey: a Weekly Template, of the Sprint Based Hockey Article Series, introduced the science behind speed development, how to incorporate sprints and speed work into a practice, and finally laid out a weekly template to properly incorporate sprints into a week of practices.
An optimal way to develop faster players:
- Develop speed by treating it as a skill
- Incorporate sprints at the start of practice
- Rest to full or near full recovery after each sprint
- Follow the short to long approach throughout a week to maximize speed development
- Use drills, small area games, or full ice live-go’s to condition for the game
- Never bag skate – ever
With ice time being valuable, and yet limited, every second counts. The Perfect Hour of Hockey Practice Template now takes the coach who trains speed and skill at the start of practice and offers a practice layout that mirrors what happens on game day. In essence, players get faster because they are not getting slower.
The Perfect Hour Template
While the term ‘perfect’ is hard to achieve, I truly believe there is a perfect hour of hockey practice that when executed, prepares a team for the game like no other practice layout before it. A team that is prepared for game demands will execute systems and skills at high speeds.
The Perfect Hour Template takes into consideration everything a players body will go through on Game Day and lays it out into time based sections that allow for mental and physical adaptation.
If a practice is a constant, steady grind, a player may not actually know what 100% feels like. They may not be ready for the quick decisions made in a game, because practice intensities are lower than the demands of the game. Hockey is a short burst of high intensity game. But a practice that has over 20-25 minutes of constant grind won’t get you there.
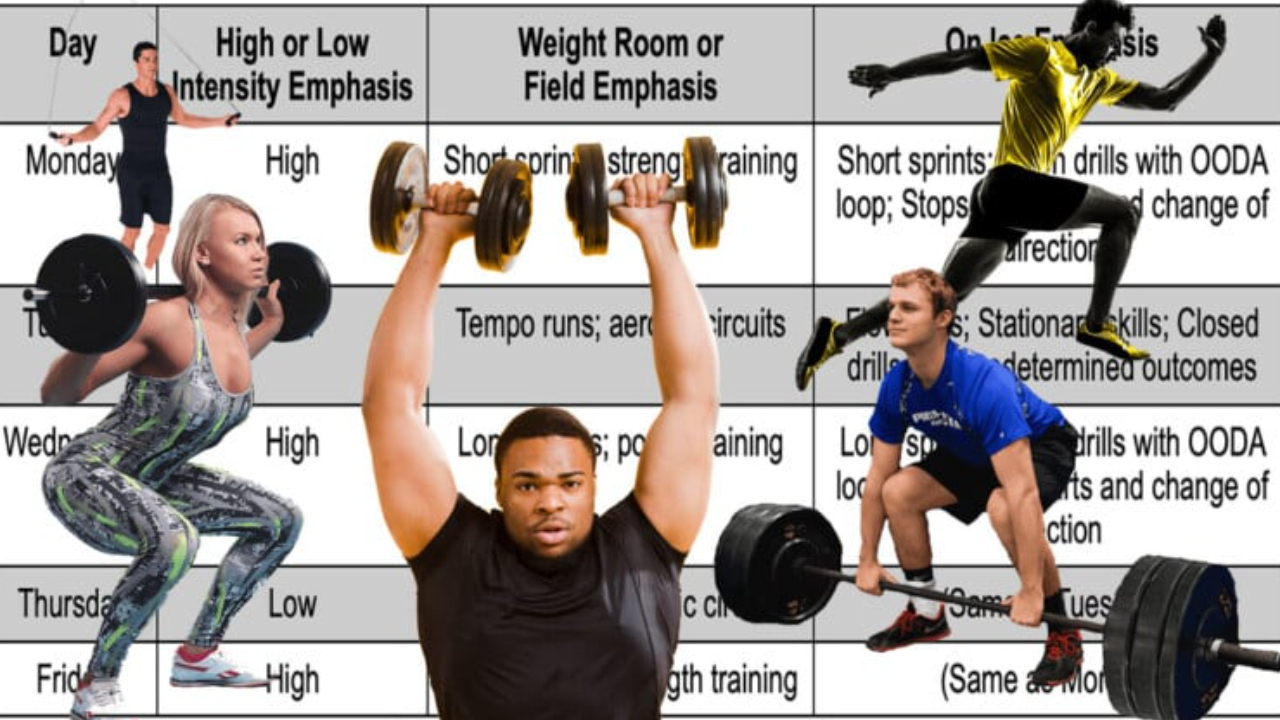
Table 1. The Perfect Hour of Hockey Practice Template.

With the above template in mind, we will now break down each time based section to understand why this Template truly is the Perfect Hour of Hockey Practice.
Minutes 0-15 (On ice warm up)
The beginning of any practice is critical because it is the optimal window to both physically and neurologically develop or enhance skills, including the skill of speed. As a reminder, keys to developing speed include:
- Keep it simple and remember less is more
- All sprints must be under 6 seconds, resting about 30 seconds for every 10 yards or meters skated
- A sprint under 6 seconds with full recovery stresses the players’ neuromuscular system (brain and body), their phosphocreatine system (explosive burst energy), and allows for recovery of both
- Players will only improve if they are sprinting over 90% of their maximum speed
See my first article for more detail on developing speed in this section of practice.
In addition to speed development, I am an advocate for dedicating the first 15 minutes of practice time to skill stations. Player development is a must within every organization from youth to junior and beyond.
The skill type and its execution should be modified based on the level, with complexity being layered in as players age.
Skill stations allow for smaller groups and therefore more puck touches, shots, passes, repetitions, etc. In addition, coaches are typically right in the drill, not hugging the wall or at center ice yelling down to someone at the goaline, which leads to better communication, instruction, and demonstration if necessary.
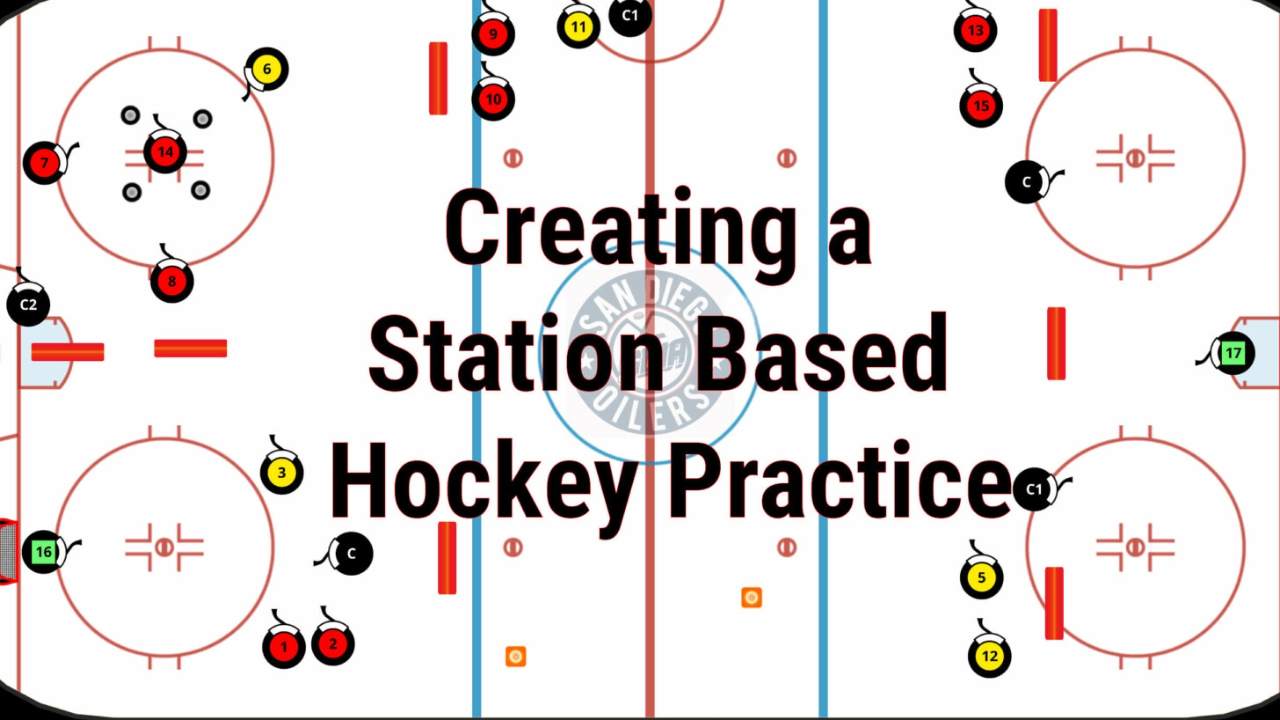
I understand teams may be limited by their available coaches. Tables 2-5 are examples of how skill stations may be performed. In addition, Video 1 shows skill work being performed with 2 and 3 coaches.
Table 2. 2 coaches, 2 groups, 2 stations. Rotate at the 7:30 mark. 4 major skills worked on twice a week for 15 total minutes of passing, shooting, stick handling, and skating.
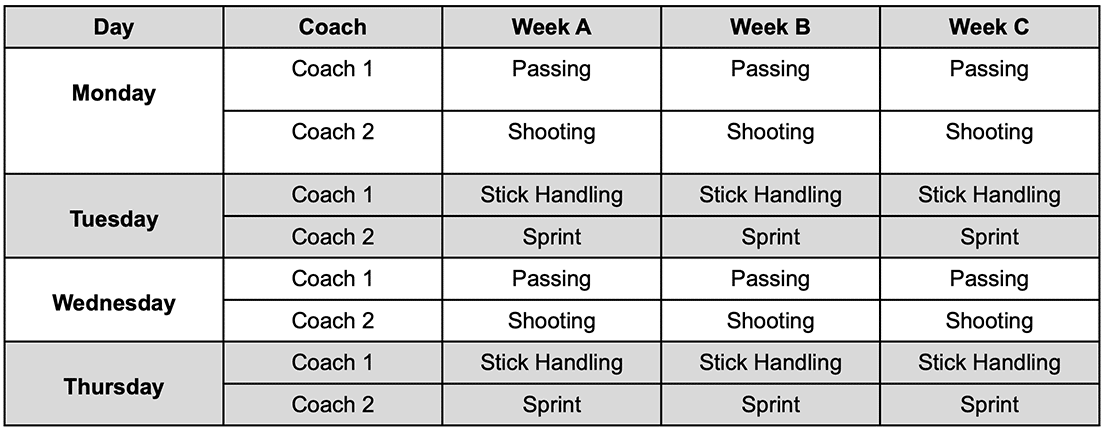
Table 3. 2 days with flow drills, 2 days with skill stations. Rotate skill stations at the 7:30 mark.

Table 4. Rotate through passing, shooting, stick handling, or sprint station every day.
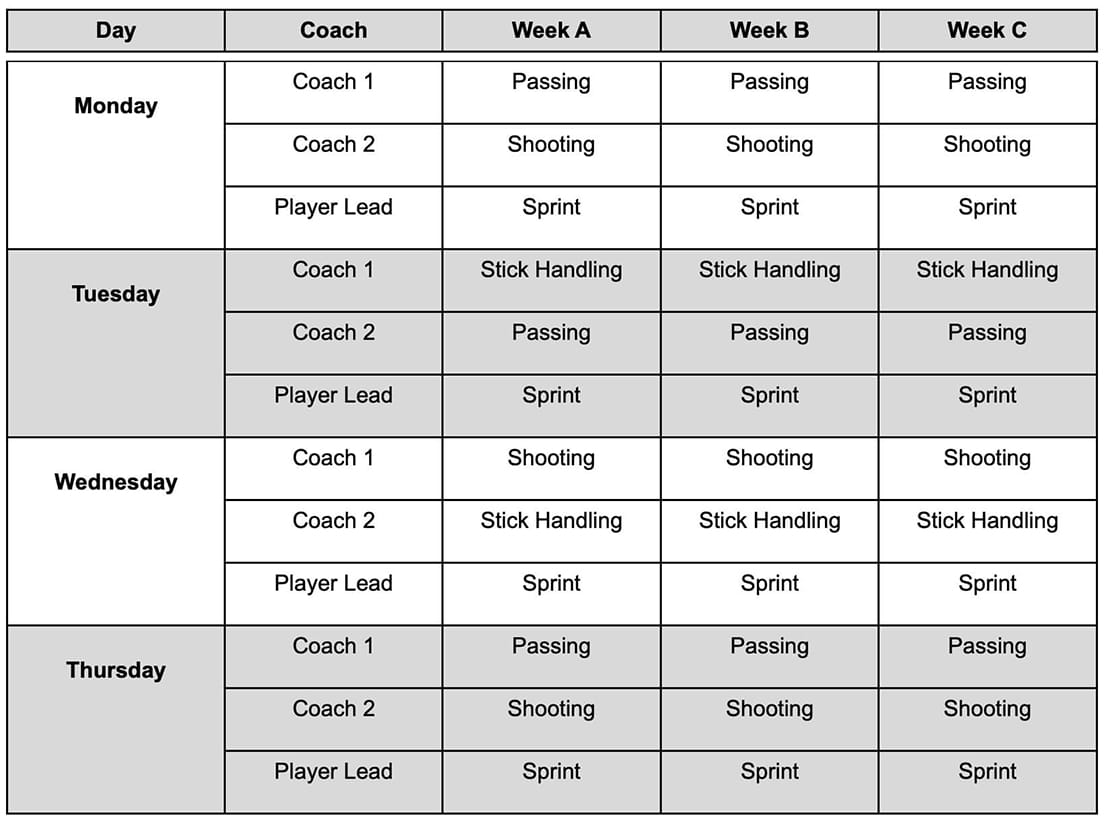
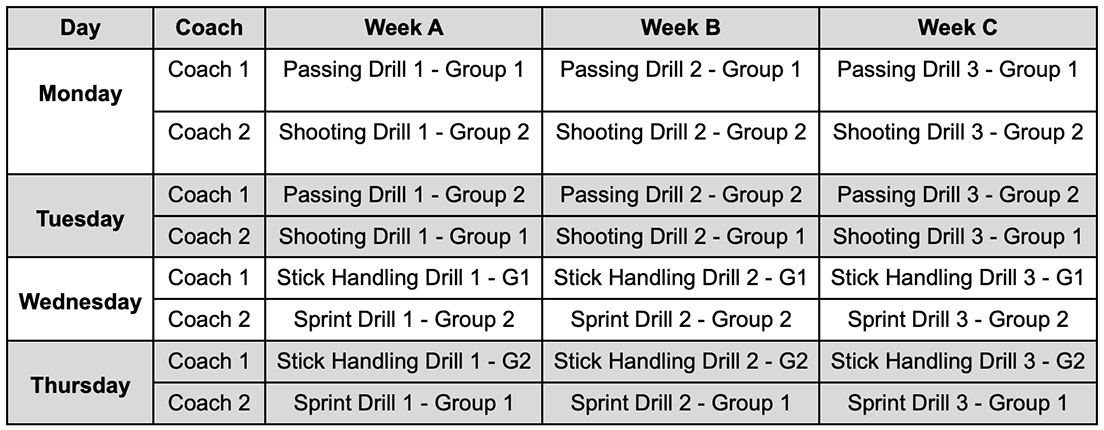
Table 5. Perhaps the most efficient for Coaches, split the team in two and keep them at one station for 15 minutes. With this method, coaches may repeat what they did for a station at 2 practices. Observe Monday and Tuesday, Week A. Coach 1 uses the same passing drill for Group 1 on Monday and Group 2 on Tuesday, which means less planning needed for the Coach. Players have a 15 minute time period to develop and enhance said skill.
Video 1. College hockey skill stations. 3 stations each day. One day sprints (with coach), passing and stick handling (with coach), shooting (with coach). Other day sprints (player lead), power skating (with coach), shooting (with coach).
Video 2. College hockey skill stations. 3 stations, 3 coaches, players rotating station to station.
Minutes 15-30 (First period)
Following the first 15 minutes of practice, the team should then transition into more high tempo, high intensity drills. Section 1 of practice should be considered lower intensity. It simulates the on ice warm up before a game. And now that the body is warm, time to turn up the heat even more, just like on Game Day.
The closer these drills can mimic the game, the better. This is where you as a hockey coach should have plenty of great ideas, more than a dryland coach could think of. If you find yourself struggling to find quality drills for this section, look no further than the hundreds, maybe thousands of drills on The Coaches Site.
This part of practice should be up tempo, high intensity, competitive, hard, etc. This is where players refine their speed for the fast paced skill and system execution required by the game.
Video 3. Full ice 5 on 5. Score is kept on scoreboard and short times are put on the clock to up the intensity. With shorter times, players will either win or lose faster, increasing competitiveness.
If you are struggling to find drills that mimic the game, ask yourself is this an open or closed drill? And how heavily is the OODA Loop used in this drill?
The OODA Loop
A major key to sporting success is the OODA Loop. If this is your first time hearing about the OODA Loop, you should spend some time familiarizing yourself with it. It may connect some dots as to why certain drills are beneficial and why some fall short.
Have you ever or do you currently coach a player who is fast, but is slow during the game? That is an IQ and more specifically an OOA Loop issue.
OODA stands for Observe, Orient, Decide, and Act. It is a recurring approach, or loop, that the brain goes through for decision making. Players automatically use the OODA Loop. However, decision making is sharpened by experiences and available skills.
For example, a forward crosses the blueline against a defenseman in a 1 on 1 scenario. Each player is running through the OODA Loop with every second that goes by as they observe their opponent, orient themselves based on previous experiences in this situation, the brain throws out multiple, possible decisions based off of systems and skills acquired, and finally an action.
And the OODA Loop repeats.
Video 4. 5 on 5 full ice, starting off of a cycle. Drill was chosen based on what Coach felt the team needed to work on. OODA Loop being performed throughout.
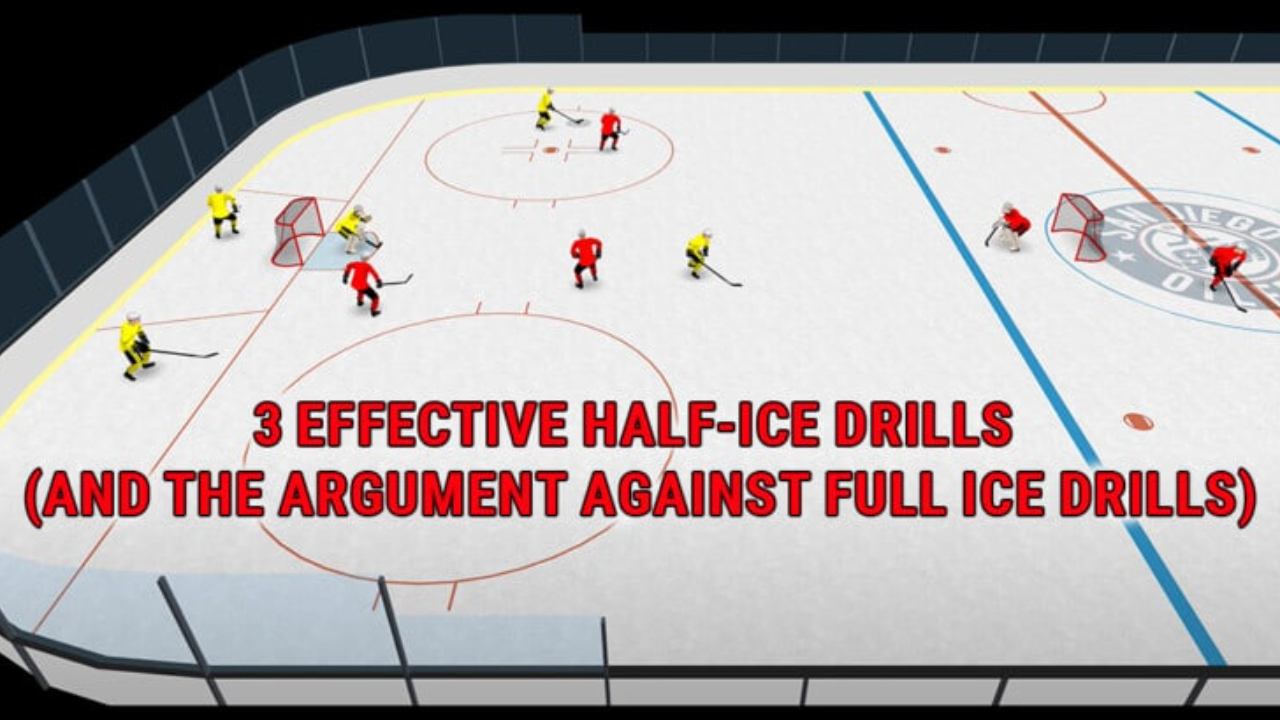
Drills, small area games, etc. should be set up to enhance the OODA Loop. In other words, try to have more open drills versus closed drills. Open drills are reactive and mimic the unknown or randomness of the game that players may find themselves in. Closed drills are ones where players perform a predetermined pattern or skill.
Open and closed drills are both beneficial, however one should be used during the first 15 minutes of practice (closed drills) and one should be used during the second and last 15 minutes of practice (open drills).
This is one of the many reasons I am opposed to classic bag skating. Players, sloppily, skate to a line with no sense of urgency and change direction. This never happens in a game. Changes of direction in a game come from reactions to players, the puck, or positioning on the ice (about to hit the goal or a wall). Bag skating is not what a hockey game demands.
Coaches, choose drills and games that put athletes in an environment to learn. Not just from successes, but failures too.
Minutes 30-45 (First intermission)
At this point in practice, the halfway point, players will be ready for lower intensities. Mentally and physically it will be nearly impossible to maintain game-like speed, execution, and intensity practice after practice. No matter how much you motivate them, the energy will not be there.
Remember, the Perfect Hour of Hockey Practice seeks to mimic the game. What comes after a hard, high intensity period of a game? An intermission. What happens during intermissions? Prepare for the demands of the game. A lower intensity section of practice allows players to:
- Practice recovering
- Have higher intensities in the next section of practice
- While fatigued, practice focusing, taking instruction, coaching cues, making adjustments, etc.
During this lower intensity section of practice, teams may:
- Work on special teams
- Install systems
- Review previous games’ breakdowns
- Game plan for future games
- May all be done with video, on a white board, or with players out on the ice
In June 2022 at The Coaches Site Live one of my favorite presentations came from Coach Kim Weiss of the Maryland Black Bears. Coach examined overtime losses her team incurred and created small area games and drills to help correct the in-game breakdowns.
It was simple and beautiful and a perfect example of what coaches may do during the 30-45 minute, lower intensity section of practice and then lead right into the 45-60 minute, high intensity section.
I picture Coach going through this during practice. Through video or on a white board, Coach identifies weak areas in their overtime systems execution. Next, the drills that will fix this problem are demonstrated and walked through so players understand the goal or target of the drills.
Some sips of water, video or white board review, implementation of new systems during overtime, and now with the drills in hand, it is time to enter the last, high intensity section of practice. The perfect segway.
Minutes 45-60 (Second period)
The final section of practice will, like the second section (15-30 minutes), be high tempo, high intensity drills.
Continuing with the example of Coach Weiss, it is here her small area games will be executed with the demands, intensities, and high pressure of a 3 on 3 overtime. Video 5 is not Coach’s drills, just examples of small area games and open drills.
Video 5. 3 on 3 small area games. OODA Loop being performed throughout, with game-like speeds and intensities
In a classic, old school hockey practice this would be where players get on the line. Enough of that! Hopefully I have written enough in this and my previous articles to break down those old school walls.
If you are still bag skating, think back to your days of playing, or ask an honest player. Players save themselves for skating at the end of practice. Can you imagine? An entire practice where they didn’t push as hard as they could.
As a Coach, if you implement the Perfect Hour of Hockey Practice Template, these will be the best, last 15 minutes of practice you have ever seen.
Players will work harder than you could ever imagine. They love the game. When you make practice like the game – competitive, meaningful, keeping score, music, etc. they will give you everything they have. They won’t even think about working hard, it will just happen.
Other Considerations
Not every hockey practice is 1 hour. If your practice is longer, perfect! Modify the template to fit your needs. Perhaps at the start of the year you have more time dedicated to skill and systems. As the year progresses, maybe you attempt several 10-20 minute high intensity sections with multiple 10-15 minute low intensity sections.
Also, as stated in previous articles, be the coach. If you have a significant weakness in your systems, drill that all day long.
To address conditioning again, sloppily skating to a line with no sense of urgency and changing direction without reacting to the puck or another player does not prepare a team for the demands of the game.
I have yet to see players performing classic bag skating during a game. However, I have seen tons of small area games played out across the entire ice surface. I have seen the OODA Loop being implemented over, and over, and over again. Don’t bag skate -ever.
Now, after a couple games on the weekend, your team may only have the energy for a single 10-15 minute high intensity effort. Or maybe it’s the day before a game and that’s all you want to do. That’s totally fine. Be the coach, and make those informed decisions.
The Perfect Hour of Hockey Practice
The key to the Perfect Hour of Hockey Practice Template is it is Sprint Based. It emphasizes speed and skill development during the optimal development window – the start of practice. And it prioritizes fast and fresh by waving high and low intensities throughout practice. In essence, players get faster because they are not getting slower.
Coaches, simulate the demands of the game:
- Section 1 – On ice warm up simulated
- Section 2 – First period simulated
- Section 3 – First intermission simulated
- Section 4 – Second period simulated
In conclusion, if you want fast players, develop their speed and do not slow them down with poorly implemented and executed practice plans.
- Treat speed as a skill and develop it at the start of practice
- Do not grind players down with attempting high intensities throughout an entire practice
- Prepare for the game through mimicking the game – warm up, intensity, recovery, intensity, etc.
- Use drills, small area games, or full ice live-go’s to condition for the game
- Never bag skate – ever

