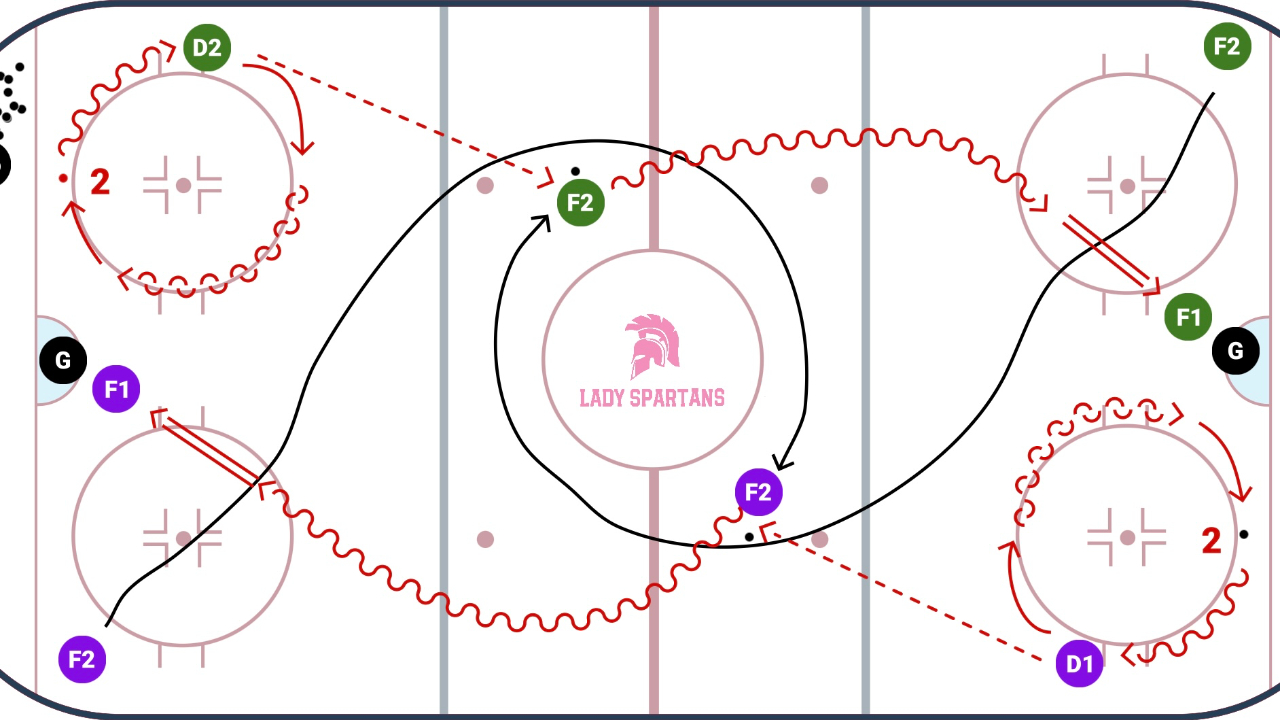
Quick Strong to Weak Side OZ Attack to Transition 3on3 w/ Back Check
1952 Views
Strong Side to WS OZ Flank Attack / High OZ Swing Transition 3on3 W/ Back Pressure
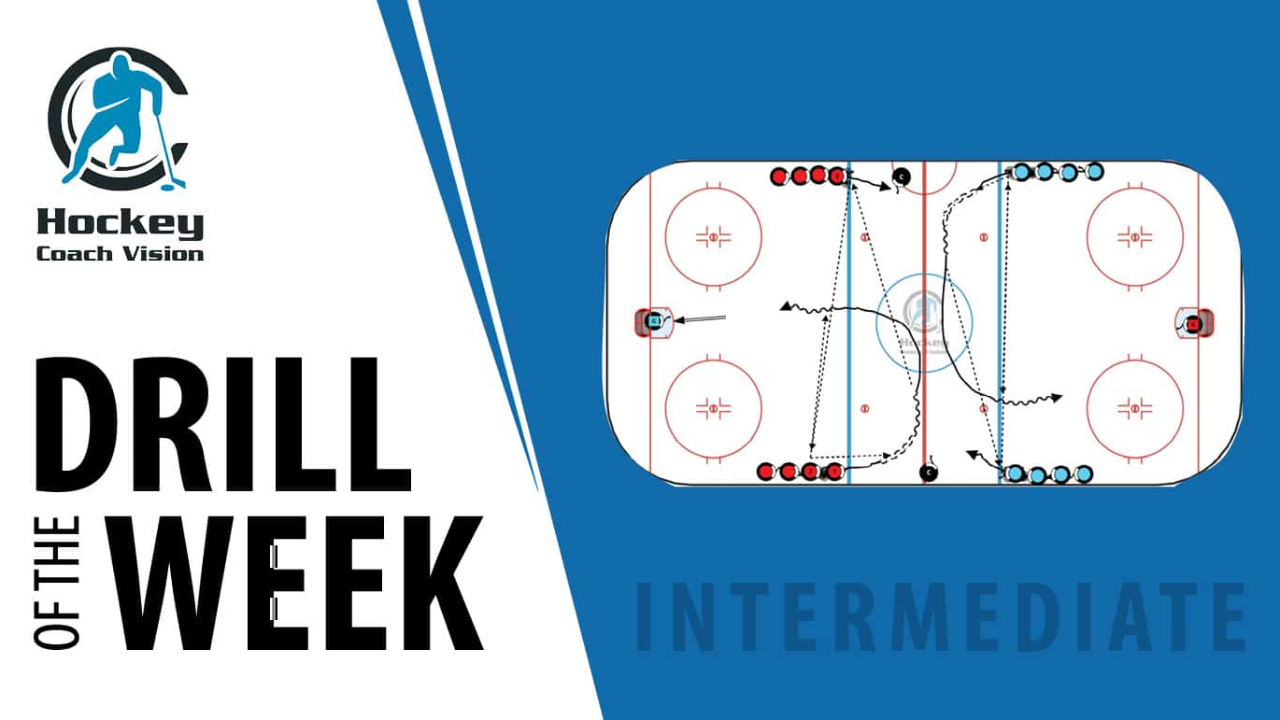
Setup
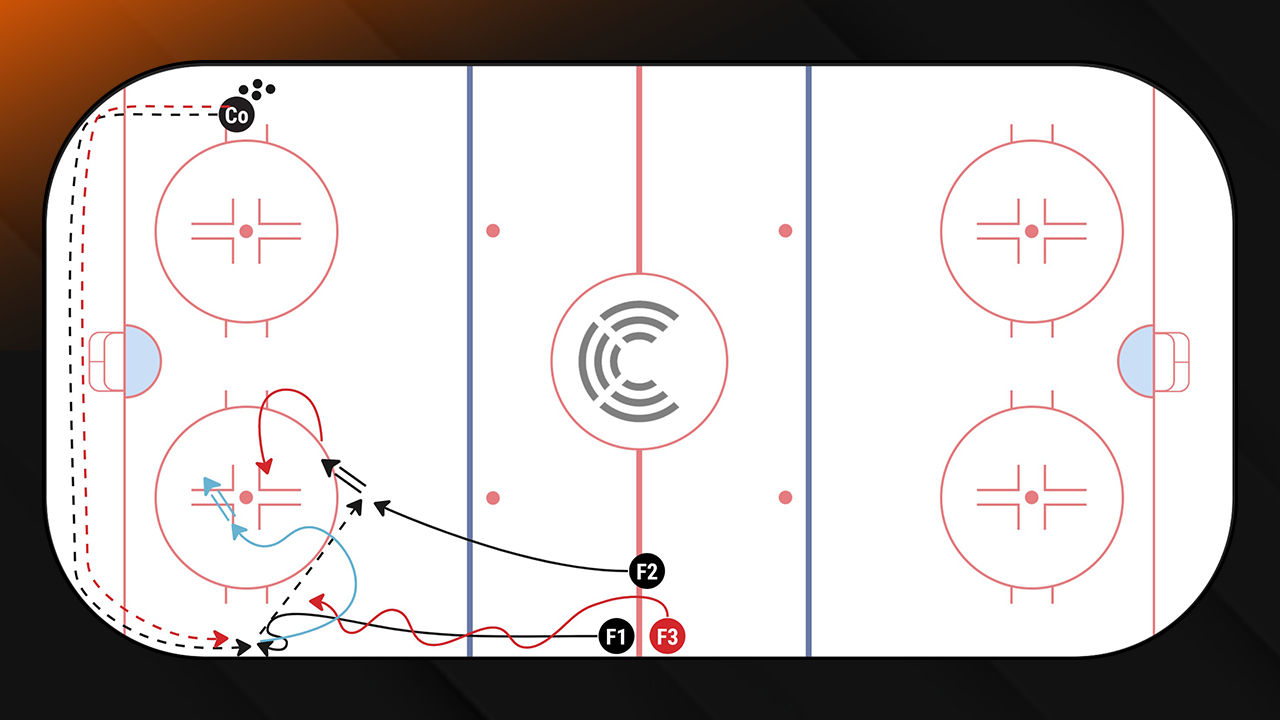
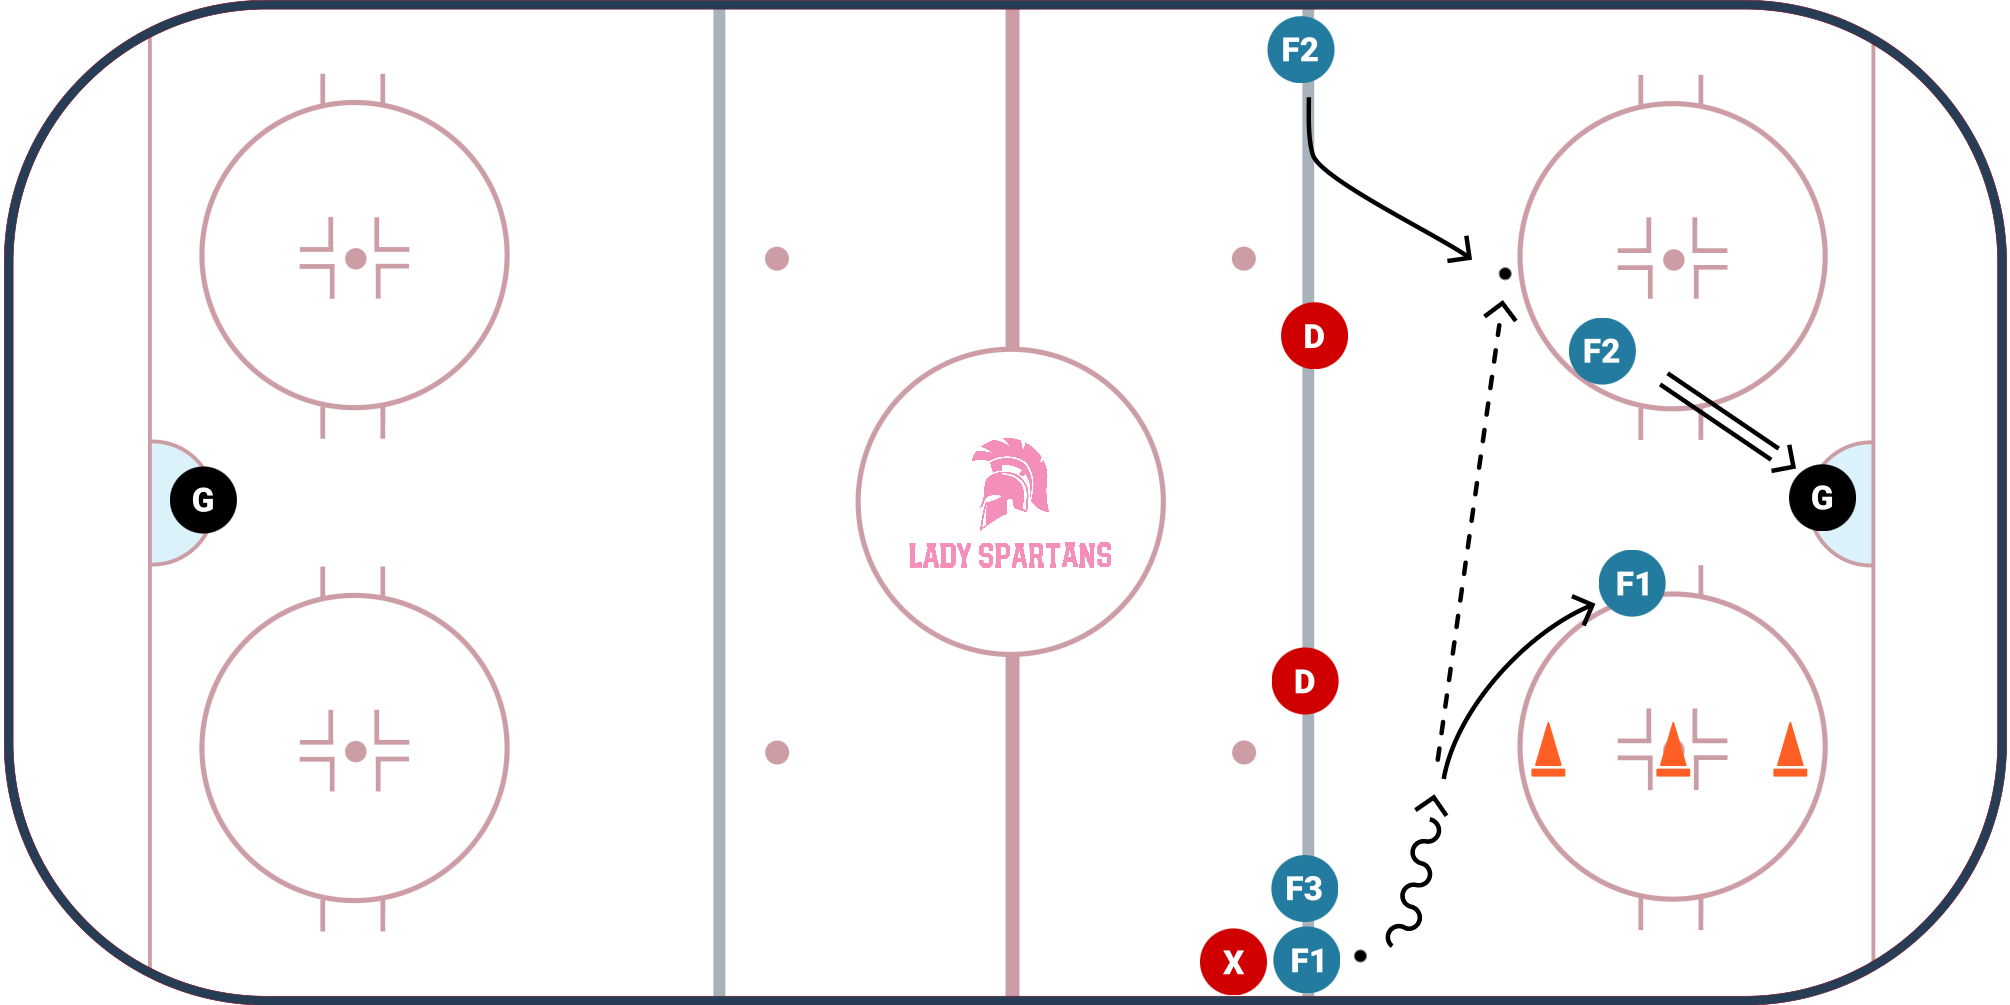
- Set up 3 cones inside one of the circles, one on the face off dot and the other 2 spaced far enough as to give players room to crossover effectively
- F1, F3 and the player tasked with back checking will line up at the blue line on the same side as the circle containing the 3 cones.
- F1 & F3 will be lined up side by side on the blue line. F1 to the outside, F3 to the inside. Back checker will line up behind F1 and step into that space once F1 takes off at the beginning of the drill.
- F2 will be lined up mirrored from F1 on the opposite side of the blue line.
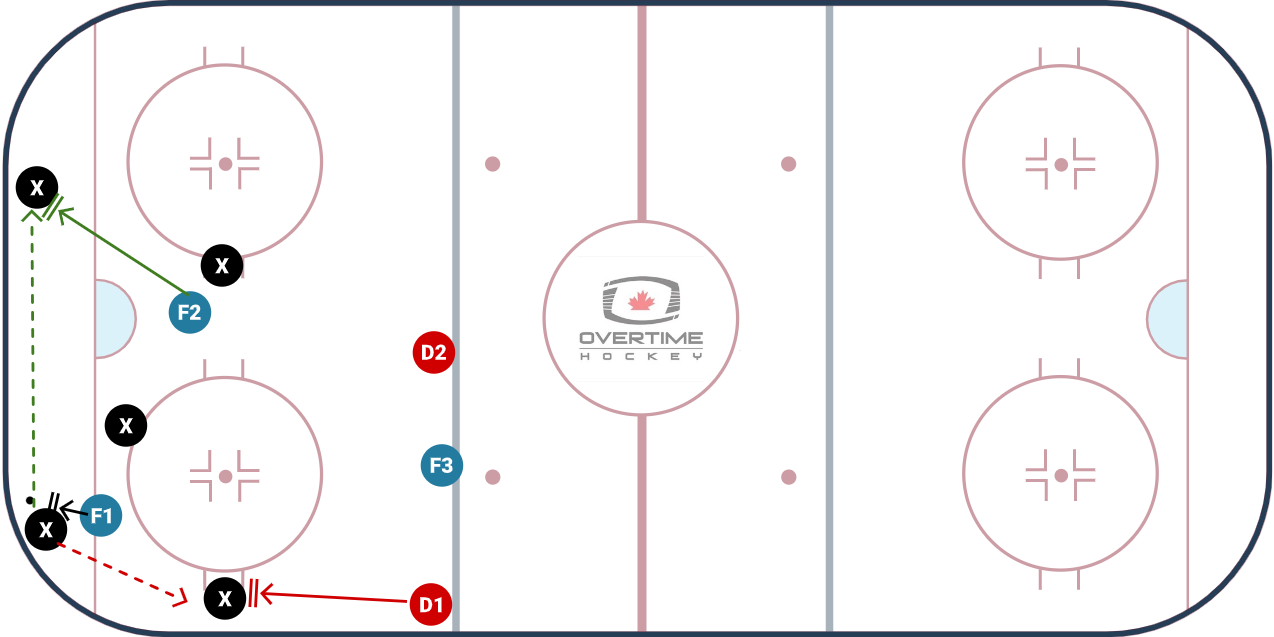
- 2 D will line up inside the dots, spaced out across the blue line.
- Goalies each take a net. Switching every 3 reps (1 cycle though lines)
Part 1 - Accuracy and Execution
- On the whistle both F1 & F2 release off the line into the zone. With a puck on their stick, F1 will explode off the line with 2-3 hard strides motioning down the boards before they break hard to the middle. At the same time F2 should motion along the blue line before breaking toward the net and calling for a cross ice pass.
- F1 will make a hard tape to tape pass to F2 and immediately break toward the net watching for any long rebounds. *Drill should restart if the pass made forces F2 to stop all forward momentum. A pass to far ahead can be picked up and returned to the slot area where F1 will be.*
- Utilizing a first touch release off a tape to tape pass, F2 should capitalize and get a quality shot off in that area of the ice.
- F1 & F2 will then swing toward the boards, F2’s route should take them to near the bottom of their respective side’s face-off circle. F1, will also swing toward the boards passing in between the 2nd and 3rd cone on their side. Emphasize the importance of taking ice back in order to build up as much speed as possible heading up ice
Part 2 - Timing and Rhythm - **Let the players work through at least 3 reps before blowing it down for a reset. There are a lot of moving parts, be patient and give them advice on adjustments as they come back into line**
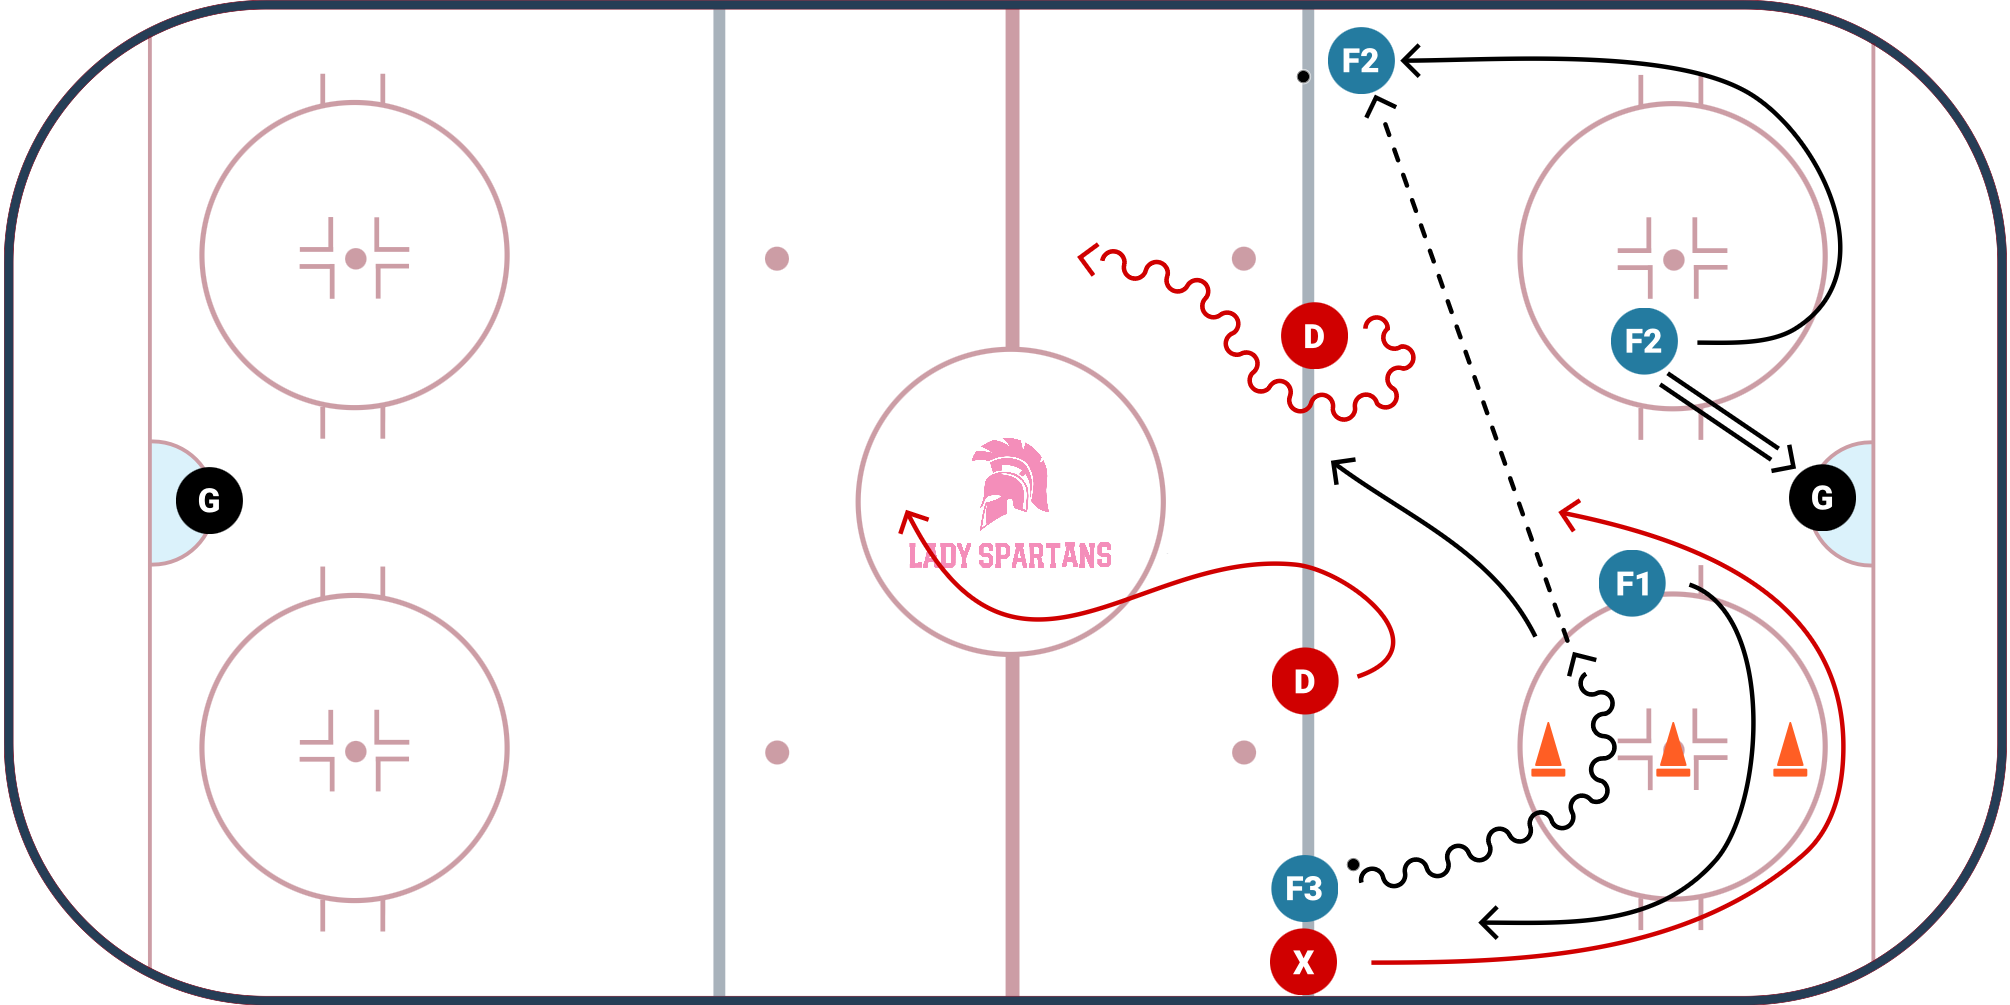
- The player back checking steps into where F1 was on the blue line in a ready position. They CANNOT move off that line until F3 decides to release.
- F3 makes the decision to release off the line, their route has them first passing though the 1st & 2nd cones and breaking toward the middle of the ice (think 45 degrees, players can make adjustments as they work through reps)
- The timing portion of this is in the angle of the pass F3 will make as F2 is full speed up the weak side. Too early and it will force F2 and F3 to switch and slow down. Too late and the defender can step up to intercept.
- F3 should be slightly under F2 allowing the pass to be made to F2 in full stride.
- The player back checking is simply racing down the wall and around the bottom of the third cone as they apply back pressure through the middle of the ice.
- Strong side D should be playing the 2-1 with F2&F3. Weakside D is “surfing” over F3 without over committing and leaving the cross ice pass wide open. If played properly D can buy time for the back checker to become involved, making it a 3on3 before the OZ.
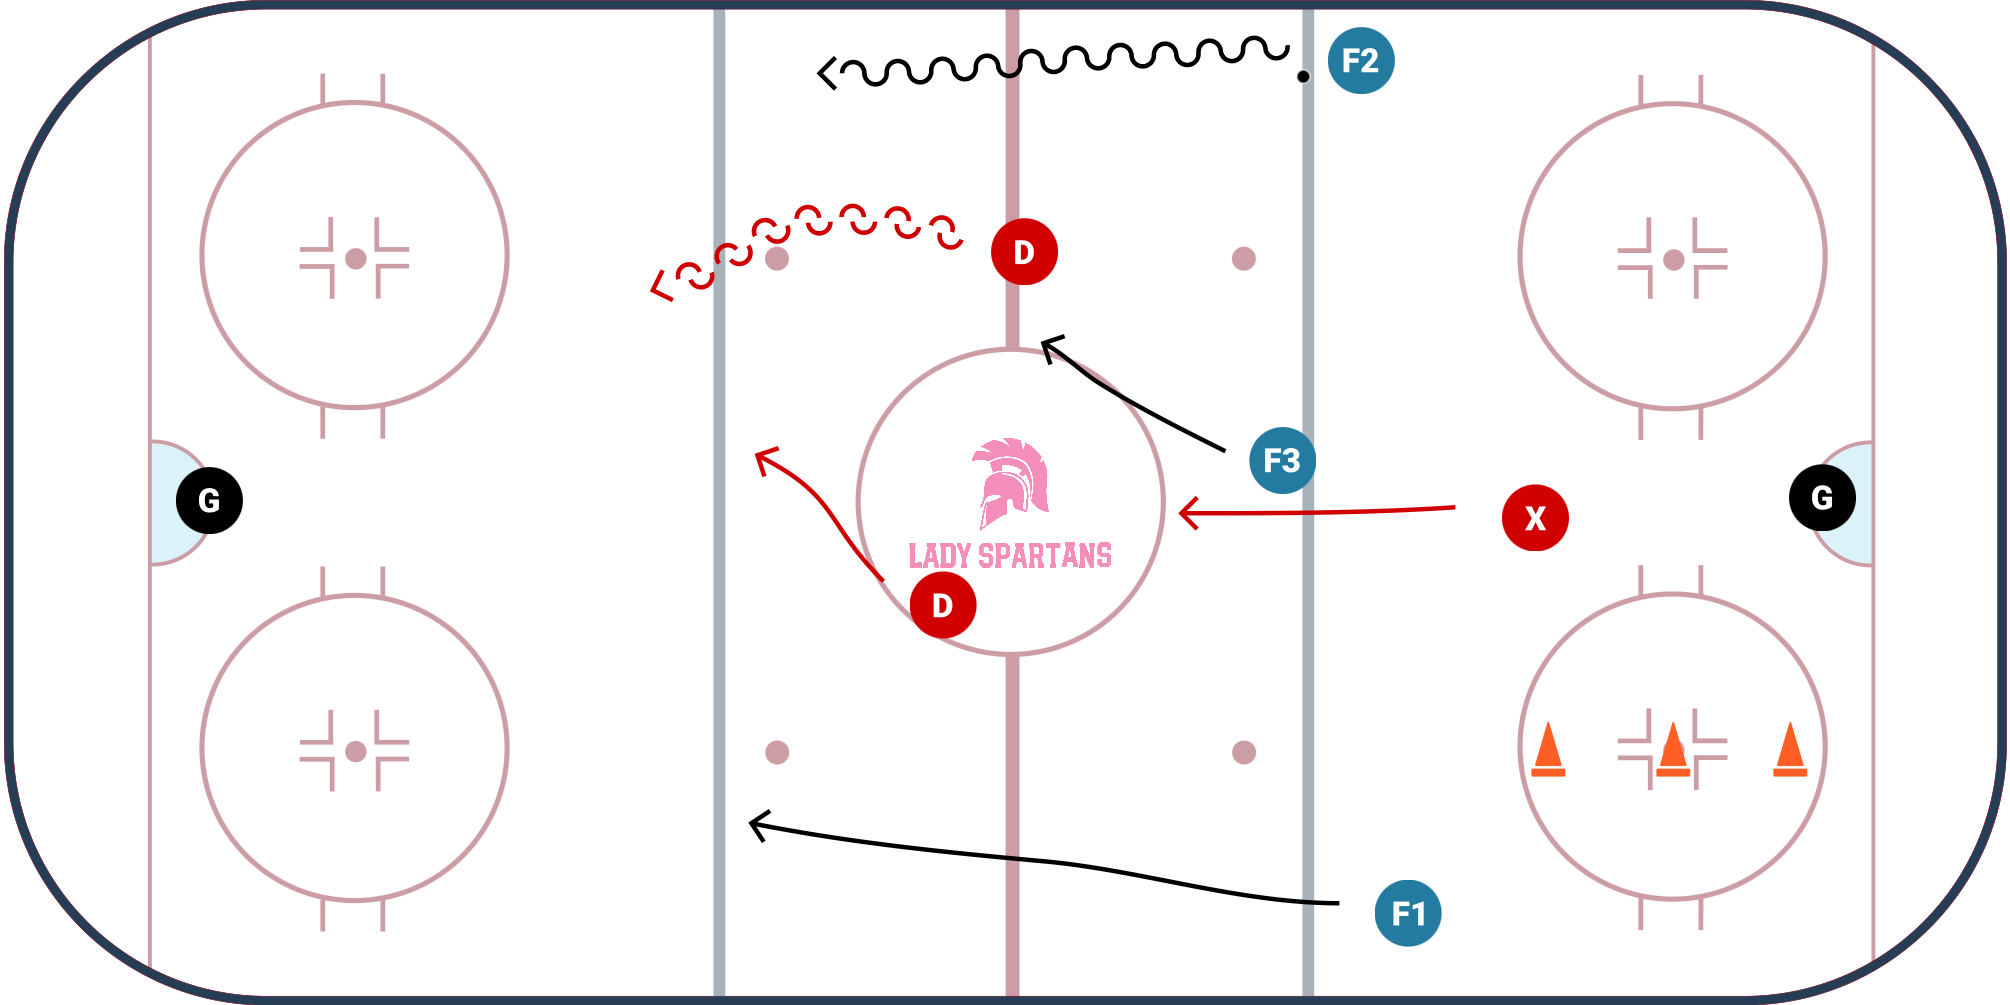
Part 3 - Capitalize on Opportunity
- Execution as the forwards exit is key as they should have the ability to execute a proper and advantageous zone entry.
- Back checker will backtrack all the way back and join the play making it a 3on3 that Coaches will let play out, blowing it down at their discretion.
Top picks |

