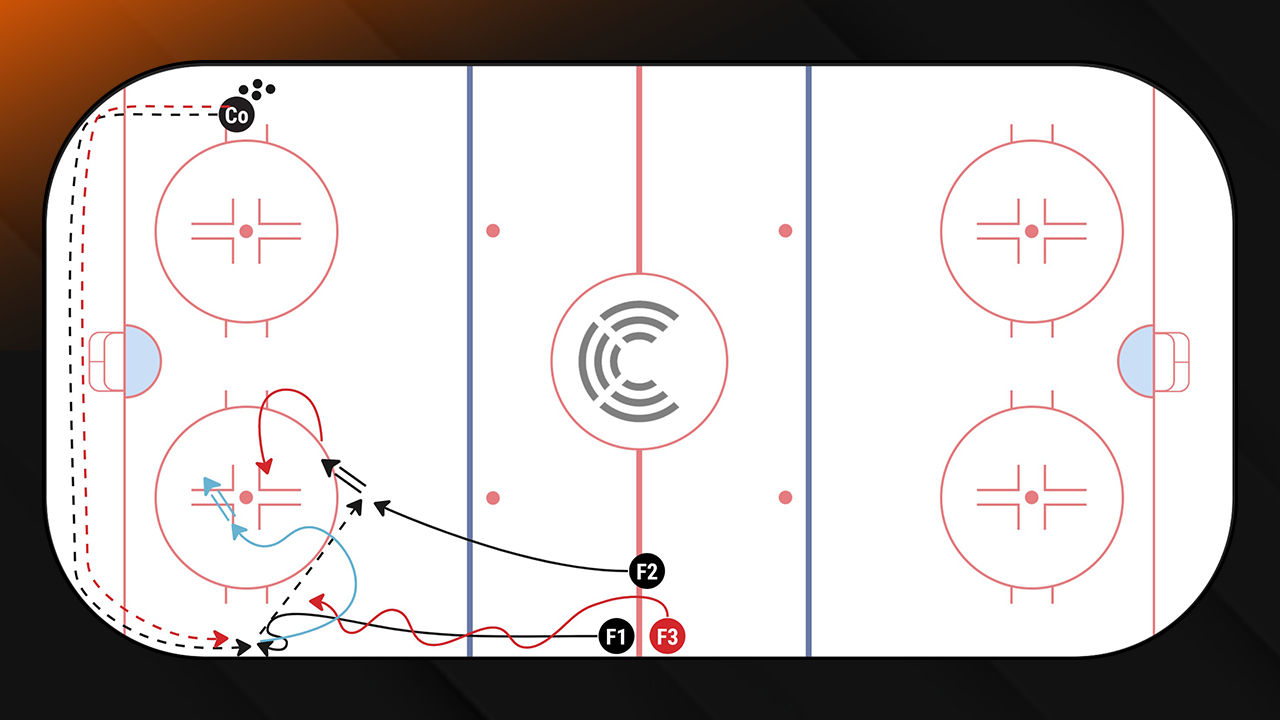
I love this clip! I find there is always a lot of confusion when the other team's F3 goes into high ice (above the top of the circles) in the defending zone.
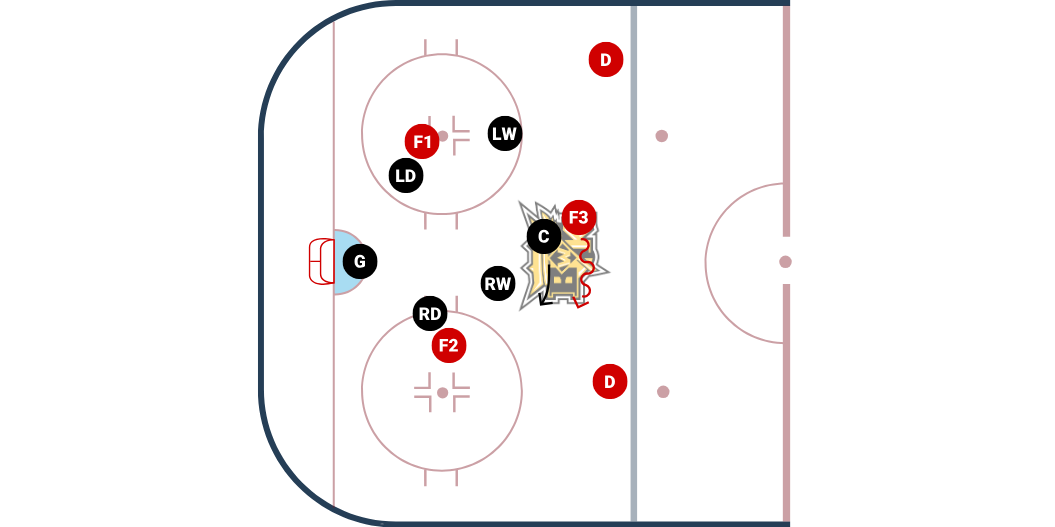
In this clip you will see it starts with a half-wall battle that we lose, and the puck is moved to their right defencemen. Our left winger is now free to attack and block that shot.
Once the other team (black in the video) F3 recovers the puck, she skates the puck to the only place we are giving her room, in high ice.
If you watch our center, she will stay with their F3, and our wingers will "build walls" at the ringette line, guiding their F3 to the weak side, forcing her to dump the puck.
As this is all happening, our D play man-on-man with their F2 and F1. So when the puck is released low, we pressure them with our second quick picking up the loose puck to begin our breakout.
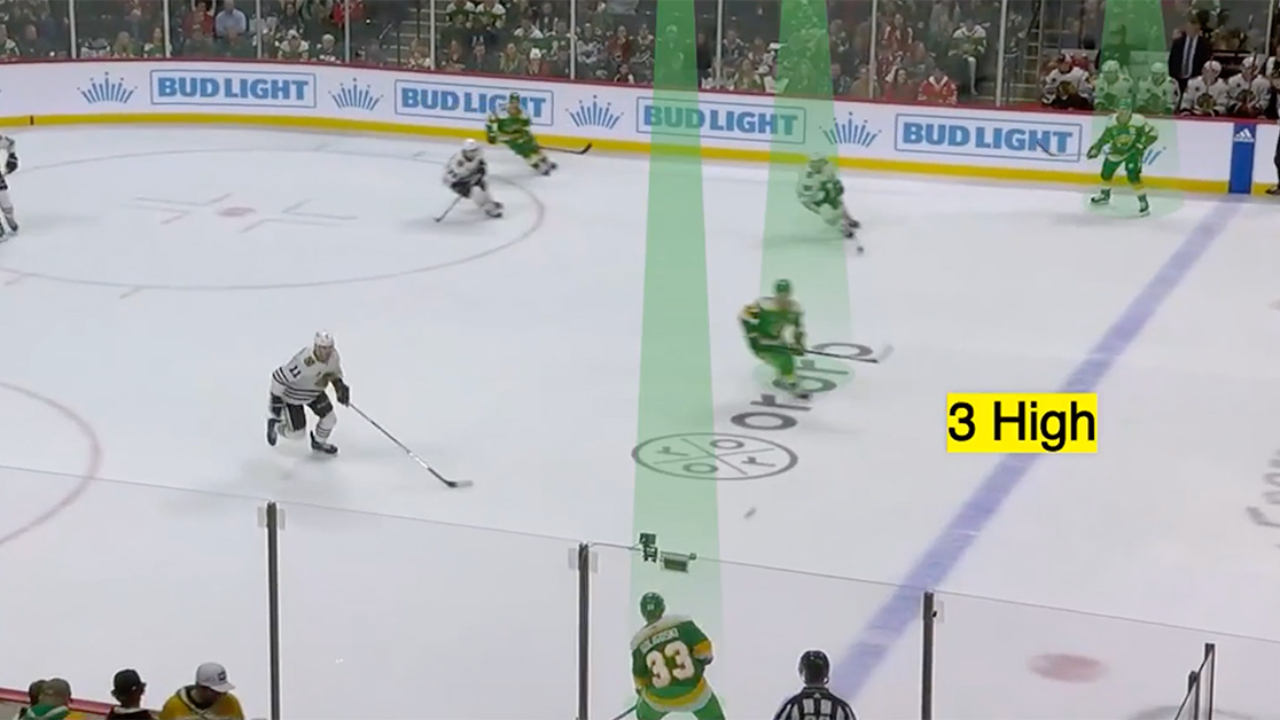
I was encouraged to teach our D zone coverage with this style, by watching the clip below;
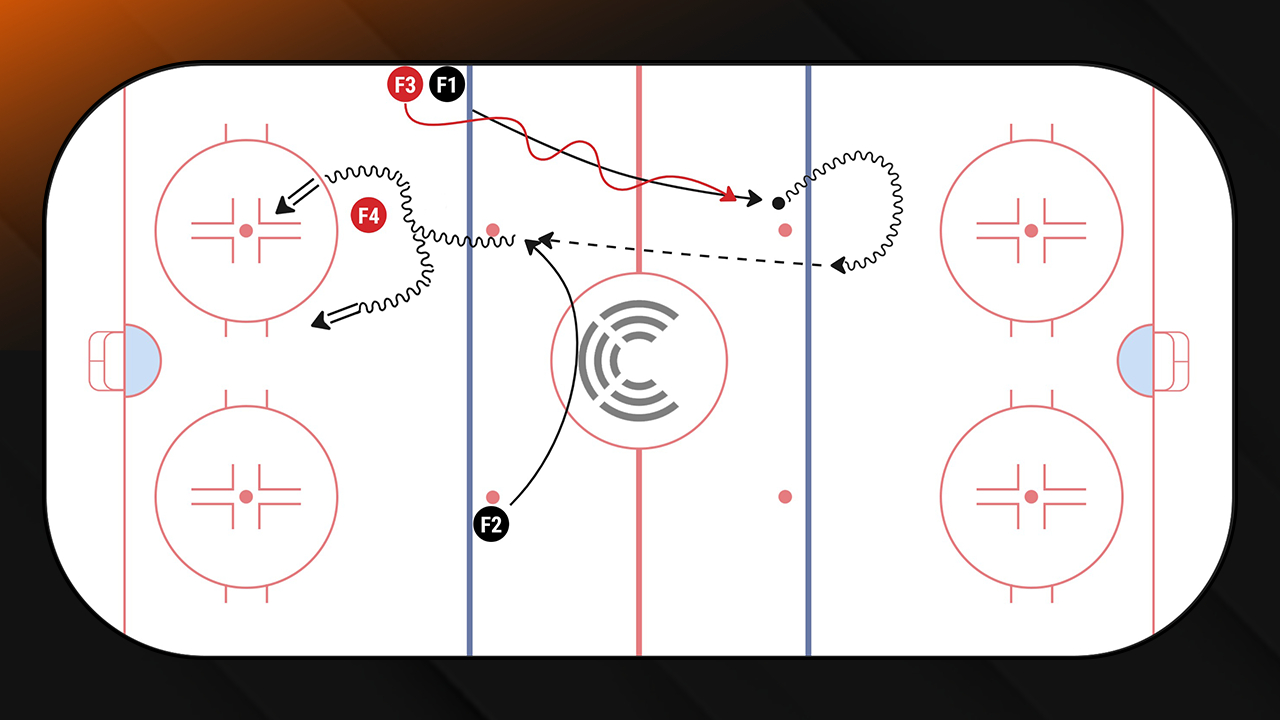
Below is a diagram to show (in a perfect world) how to defend their F3 in high ice. In the case of a "scissors" this will release your wingers to attack their D, while your F3 continues to play 1on1 with their F3. For a great drill on this D zone coverage, check out Chalk Talk; Paradox 2.
